Near midnight, after a film-festival screening had emptied and the last equipment cases were stacked against the wall, I placed a strip of 35mm negatives above a small lightbox. A DSLR and macro lens hung from a copy stand, apparently square and steady. The center of my first test frame looked crisp, but the right edge dissolved into softness, and a dark fiber that had been invisible to my eyes crossed the projected sky.
That failed frame explained the real challenge of learning how to scan 35mm film with a DSLR. Camera scanning is simply the act of photographing a negative with a digital camera, but a useful result depends on treating the setup as a controlled optical duplication system. Film must remain flat, the sensor and negative must be parallel, illumination must be uniform, and exposure must preserve the information that conversion software will need later. A DSLR does not automatically outperform a dedicated scanner; it becomes effective when every part of the rig works consistently.
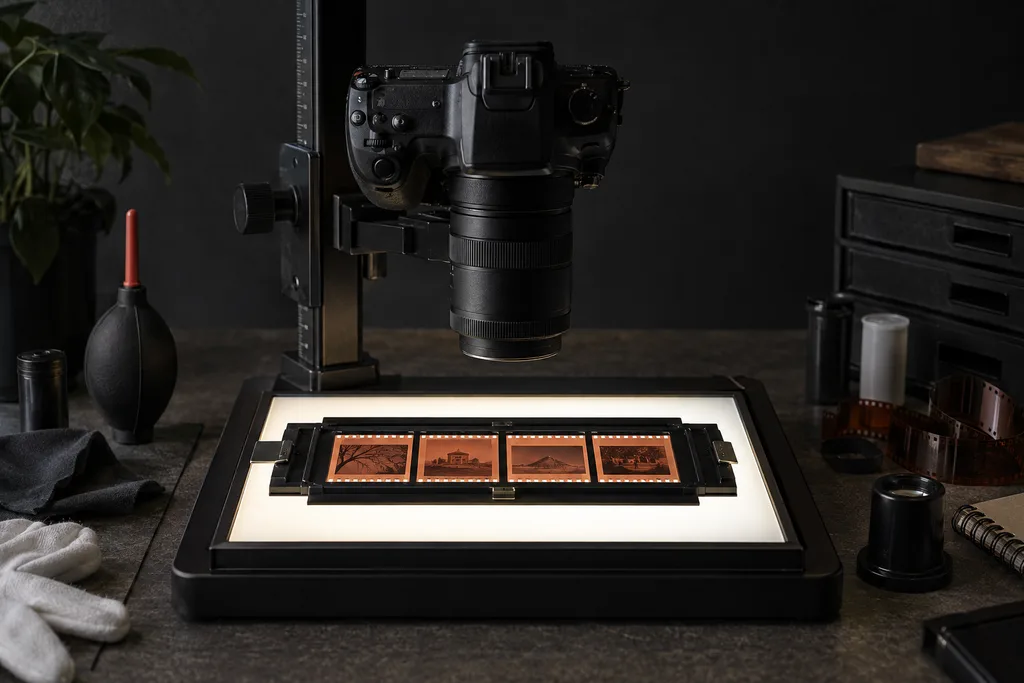
Build a Flat, Even, Repeatable Scanning Rig
A practical rig needs a DSLR or mirrorless camera, a close-focusing lens, a film holder, a rigid support, and a diffused backlight. Add a hand blower, a clean working surface, a remote release or self-timer, and a sensible file-naming system. Tethering software is optional, although a large computer preview can make corner sharpness, dust, and exposure changes much easier to notice. Resolution matters, but more pixels cannot repair curled film, lens weakness, or poor alignment.
A true 1:1 macro lens is usually the most dependable choice because it is designed to reproduce flat, close subjects with good detail across the frame. On a full-frame camera, 1:1 reproduction can approximately fill the sensor with the roughly 36 × 24 mm image area of a 35mm frame. That does not make 1:1 mandatory. A crop-sensor camera reaches tight framing at a lower reproduction ratio, while the holder, lens working distance, and desired border determine how much of the sensor is actually used. A standard lens with extension tubes may work, but it should be tested for corner quality and adequate working distance rather than assumed to be equivalent.
The holder deserves as much attention as the camera. It should restrain curl, keep the frame registered, mask stray light without hiding wanted image area, and advance from one exposure to the next without disturbing alignment. Some holders exclude the sprocket holes; others reveal them but sacrifice sensor coverage. Neither approach is inherently correct. Choose according to whether the photographic image or the entire physical strip is your priority.
A copy stand is convenient because its camera position can be adjusted vertically and then locked. An enlarger column can serve the same purpose, and a tripod can work if its head, center column, and legs remain rigid. Budget first for stability, flatness, and repeatability. An expensive camera on a flexible support is a less useful scanning tool than a modest camera attached to a carefully aligned rig.
Align the Camera Before You Adjust the Exposure
Alignment is the first variable I inspect when one edge looks weaker than the other. Center sharpness can be convincing even while a slight tilt moves two corners outside the focus plane. Position the camera so its sensor is parallel to the film, center the frame without keystone distortion, and examine all four corners at high magnification. A small mirror placed temporarily in the holder can help with rough alignment: when the reflected center of the lens appears centered, the two planes are close to parallel. The final test, however, is an actual negative with visible grain or fine detail across the frame.
The backlight must cover the complete frame with even brightness and no visible LED pattern, texture, or colored patches. A high-CRI light source is preferable for color negatives because weak spectral output can complicate color correction, although a high rating alone does not guarantee perfect color. Leave enough diffusion or physical separation between the LEDs and film to eliminate hotspots. Test a blank or unexposed area for falloff, and shield the setup from overhead lamps and window reflections that can reduce contrast.
LED panels can also interact with electronic shutters or short exposure times, producing bands that may not be obvious on the camera display. If banding appears, try a different shutter speed, mechanical shutter, or continuous light source. Make one change at a time; otherwise an illumination problem can easily be mistaken for a conversion problem.
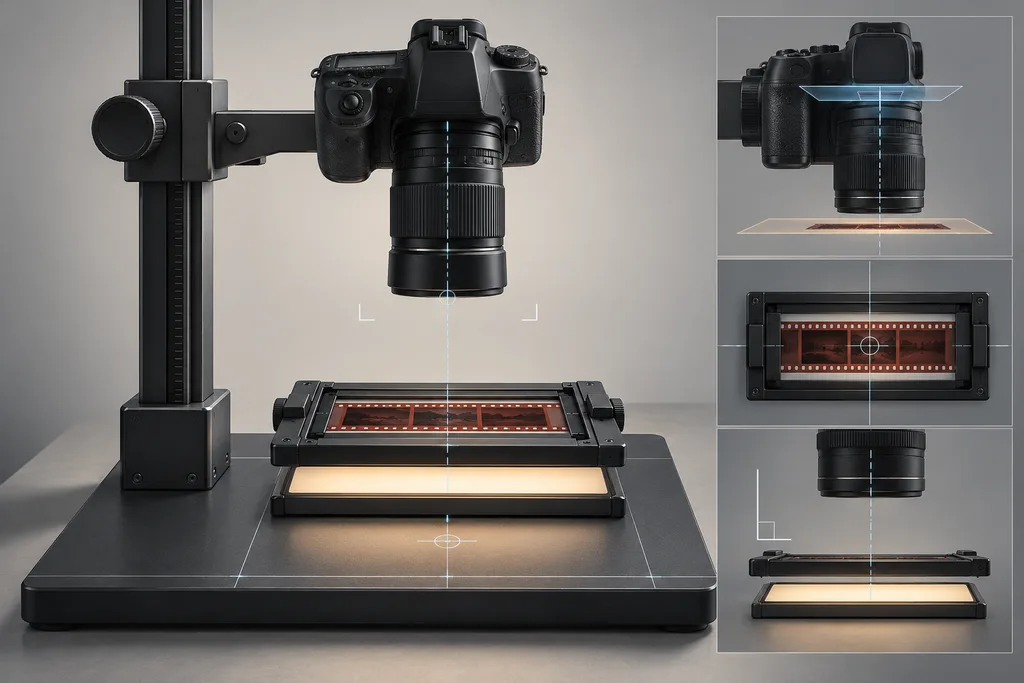
How to Scan 35mm Film With a DSLR, Frame by Frame
Begin with RAW capture when the camera and conversion workflow permit it. Set ISO 100 or the camera’s cleanest base ISO, use live-view magnification, and focus manually on the film grain or sharply defined subject detail. An aperture around f/5.6 to f/8 is a sound starting range: wider settings may expose field curvature or alignment errors, while smaller apertures can soften fine detail through diffraction. Test your own lens instead of treating one aperture as universal.
Nikon’s guidance for compatible Negative Digitizer workflows recommends a micro lens, a high-Ra light source, ISO 100, and f/8 as starting choices. Its supported in-camera mode is a specific feature, not something available on every DSLR. The same Nikon D780 manual also states that photographs made in that mode are saved as JPEGs, even when RAW is otherwise selected, and that the feature provides no correction for dust, scratches, or uneven fading.
For a general RAW workflow, manual exposure offers the best frame-to-frame consistency. Aperture priority can be useful during initial testing, but variations in negative density may cause the meter to change shutter speed from frame to frame. Judge exposure with the histogram and magnified preview rather than the orange appearance of a color negative. Preserve important film detail without clipping either end of the captured data. There is no single correct shutter speed; once ISO and aperture are fixed, choose the time that produces a clean histogram with your film and light source.
After focus is confirmed, disable autofocus so the lens does not hunt between frames. Use a two-second timer, remote release, or tethered capture to avoid touching the camera. If the camera is rigidly mounted, follow its manufacturer’s guidance on disabling optical or sensor stabilization. A long exposure is not a problem when the assembly is stable, but vibration from a loose column, floor movement, mirror action, or shutter interaction will soften the grain that you carefully focused.
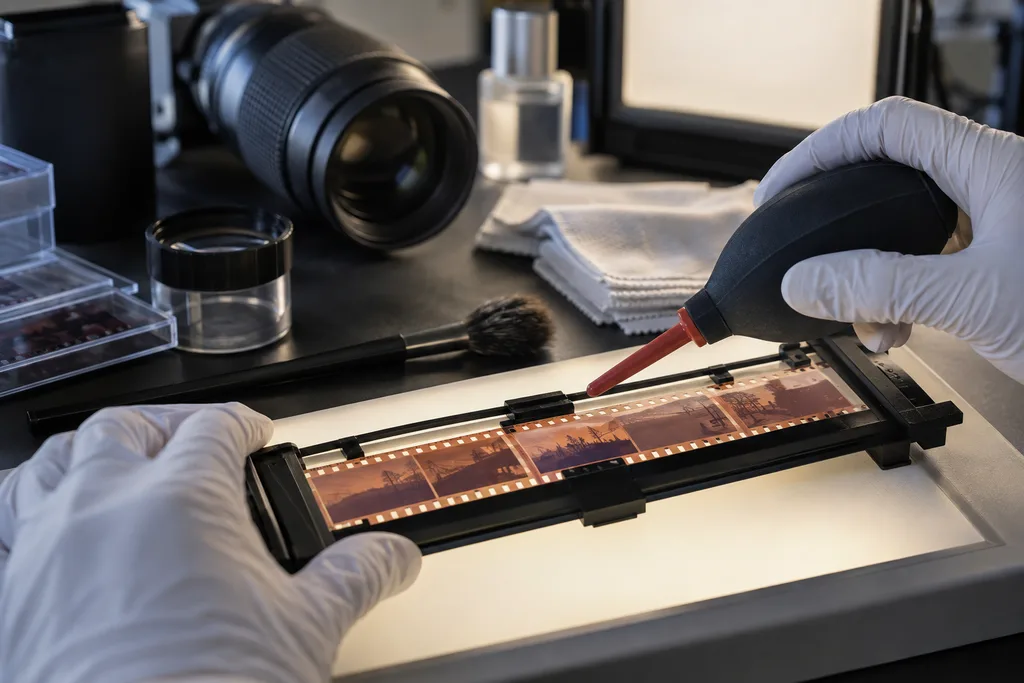
Clean the negative gently with a blower, keeping the nozzle clear of the film and avoiding aggressive canned air. Handle the strip only by its edges with clean, dry hands or suitable clean gloves; gloves are not helpful if they are dusty, textured, or likely to snag the emulsion. Load the film with minimal contact, confirm its orientation, and make sure the holder closes without buckling the strip.
Capture one test frame before committing to the roll. Inspect the center, edges, and corners at full magnification. Look for uneven focus, flare, reflections, dust, clipped detail, and brightness gradients. If one side is soft, do not compensate by stopping the lens down immediately; first check sensor-to-film alignment and film curl. When the test survives inspection, lock the focus and support, then advance each frame without moving the rig.
Keep the sequence traceable. A filename containing the roll, sleeve, and frame number is more useful months later than the camera’s default numbering. Consistent naming also helps when a corrected positive, high-resolution master, and delivery JPEG all derive from the same capture.
Turn the Captured Negative Into a Positive
Pressing the shutter completes the capture, not the scan. The camera has recorded a digital photograph of reversed film densities. Software must invert those tonal values and establish useful black, white, and midtone relationships. Dedicated negative-conversion software can automate much of this work, a RAW processor can use curves and channel controls, and an image editor can perform a manual inversion. Each route can succeed, but none guarantees one universally correct interpretation.
Black-and-white negatives are generally simpler because there is no orange color base to neutralize. They still require decisions about contrast, shadow density, highlight detail, and dust. Color negatives demand more than a basic invert command: the orange mask affects the channels differently, and the final balance depends on film stock, original exposure, backlight spectrum, camera profile, conversion method, and taste. Establish a neutral starting point from an appropriate film-base area when the software supports it, then correct the image by reference to plausible neutrals, skin, and known scene colors.
Preserve the untouched RAW capture as the master and perform inversion, color balancing, spotting, and sharpening on a working copy or through nondestructive adjustments. This makes later reinterpretation possible when software improves or a first conversion proves too contrasty. It also separates capture defects from editing decisions: a new curve can repair poor tonality, but it cannot restore a corner blurred by tilted film.
Fix the Problems That Waste the Most Time
A frame that is sharp on one side and soft on the other usually points to camera tilt, film curl, or a mismatch between the focus plane and film plane. If opposite corners differ, recheck both holder flatness and camera alignment. Uneven brightness more often indicates a hotspot, inadequate diffusion, off-center light, or a holder casting a shadow. Photographing a uniformly clear section can reveal illumination patterns before they become entangled with picture content.
Low contrast frequently comes from room light reflecting between the negative and lens. Shade the film stage, darken nearby surfaces, and check whether the holder exposes more glowing panel than necessary. A persistent color cast can originate in the light source, an unsuitable white-balance reference, the orange-mask conversion, or mixed room lighting. Fix inconsistency at capture before attempting elaborate channel corrections.
Dust is merciless at macro magnification. Blow the film and inspect the holder between strips rather than planning to remove every mark later. Normal DSLR film scanning does not provide the infrared dust and scratch detection found in some specialized scanners, and software spot removal is a manual or content-aware repair rather than an equivalent capture channel. Existing scratches, embedded dirt, and damaged emulsion may remain visible even after careful handling.
If successive frames change unexpectedly, look for automatic exposure, autofocus, automatic white balance, a shifting holder, or an unstable light. Blur can come from vibration even when live view looked sharp. Banding suggests an LED-and-shutter interaction. Cropped sprockets or clipped image edges usually reflect holder geometry or framing, not a lack of sensor resolution. Diagnose each symptom at its physical source instead of relying on post-processing to conceal it.
Is DSLR Scanning Worth the Setup?
Camera scanning film can be fast and repeatable after the rig is aligned, particularly for someone who already owns a suitable body and macro lens. It also provides direct control over exposure and RAW processing. The setup period is real, however, and color conversion, dust spotting, and file management add work that is easy to underestimate.
A dedicated scanner may be more approachable for someone who wants an integrated transport, established software, or infrared cleaning on compatible color film. A laboratory can be more sensible for occasional rolls, fragile originals, or projects whose value exceeds the operator’s experience. The broader comparison of ways to digitize old slides and film depends on volume, condition, turnaround, and intended output rather than a simple claim that one device is always superior.
Useful detail is limited by the original exposure, film grain, focus of the taking camera, macro-lens performance, alignment, sensor resolution, and final presentation size. Evaluate sample frames at full resolution and at the size in which they will actually be printed or displayed. Technical perfection at 100 percent magnification is not the only measure of a successful family photograph or documentary record.
Questions About DSLR Film Scanning
Can I scan 35mm film with an ordinary lens?
Possibly, but a standard lens may not focus closely enough to fill the sensor and may lose sharpness toward the edges. Extension tubes can improve magnification, yet they also change working distance and require careful testing. A purpose-built macro lens is preferred because close-range, flat-field reproduction is central to this task.
Should I capture color negatives directly as positive images?
Only supported cameras offer an in-camera negative mode, and such modes can limit file format or adjustment options. Most flexible workflows capture a RAW photograph of the negative and create the positive later in software. That approach preserves the original sensor data while leaving color and contrast decisions reversible.
Do I need a dedicated film scanner?
No, but a DSLR is an alternative workflow rather than an automatic replacement. Choose according to equipment already available, roll volume, required consistency, willingness to build a rig, and the importance of integrated dust removal or guided conversion.
A Repeatable Workflow Beats a Complicated One
The reliable answer to how to scan 35mm film with a DSLR is straightforward: clean and flatten the film, place it over an even high-CRI backlight, mount a macro lens on a stable support, align the sensor parallel to the negative, focus manually, use low ISO and a tested moderate aperture, and expose from the histogram. Inspect one test frame before copying the roll, preserve the original capture, and convert a working copy into a positive.
That late-night festival negative became usable only after I leveled the camera again, removed the fiber, and repeated the test. The best rig is not the most elaborate one; it is the setup that can be rebuilt on an ordinary working day and produce consistent frames without turning every roll into a new optical experiment.