At the rear of a small live venue, the stage manager asks for one essential still. You raise the camera, press the shutter, and hear the exposure without seeing any flash, even though the unit worked earlier. The camera may still carry the silent settings used during the performance. If you are asking, “why is my on-camera flash not firing,” resist changing several controls at once. First identify what the equipment actually does: check power and readiness, test the flash independently, inspect its physical connection, review camera restrictions, and reproduce the problem in a controlled still-photo setup.

Identify exactly what happens when you press the shutter
“The flash does not work” can describe several distinct symptoms. A blank power display suggests a battery, compartment, switch, or internal power problem. A charging symbol that never reaches readiness points toward depleted batteries, excessive battery resistance, poor compartment contact, heat protection, or a fault in the charging circuit. No response from the flash’s test button strengthens the case for a flash-side problem, although test-button restrictions vary among models.
If the test flash works and the camera cannot trigger it, concentrate on seating, contact communication, compatibility, and camera settings. Intermittent firing often follows incomplete insertion, dirty or recessed contacts, slow recycling, rapid drive operation, or rising temperature. A visible burst followed by a dark frame, dark band, or partly illuminated image belongs to synchronization and exposure diagnosis. These observations narrow the search; none proves that a particular component has failed.
Confirm power, readiness, and recycle status
Switch off the flash and verify every battery against the polarity diagram inside its compartment. Use a matched set of fresh batteries or fully charged rechargeable cells of a type approved in the manual. Mixing ages, capacities, or charge levels can produce a normal-looking display while recycle performance collapses under load. Make sure the compartment door closes completely. During time-sensitive festival work, I replace an uncertain set together because apparently usable cells can still sag while the capacitor charges.
Switch the flash on and wait for its documented ready indication before testing. Ready-lamp colors, quick-flash states, audible signals, and minimum charge thresholds differ. A partial-charge indication may permit a reduced test or exposure on one model and prevent operation on another. Canon’s EL-10 power and test-flash instructions, for example, explain its ready indications, quick-flash conditions, test control, and an ordinary attached-use auto-off interval of about 90 seconds. That timing is specific to the EL-10 and changes in some wireless configurations.
Wake a sleeping unit with its documented control or a light shutter-button press, then allow it to recharge. Repeated full-power frames can lengthen recycle time substantially. Sustained firing may also invoke thermal protection, temporarily limiting or stopping output. When a heat warning appears, pause and follow the cooling guidance in the manual. Unusual heat, smoke, odor, swelling, leakage, or persistent error messages are reasons to power down, remove the batteries only when it is safe, and stop testing.
Reseat the flash and inspect the hot shoe
Power down both devices before removing or mounting the flash. Release the foot lock fully, slide the foot along the shoe rails until it reaches the documented end position, and engage the lock as directed. I have encountered feet that felt secure because the clamp had tightened while the foot remained slightly short of its final position. That small gap can leave the firing contact or digital communication pins misaligned.
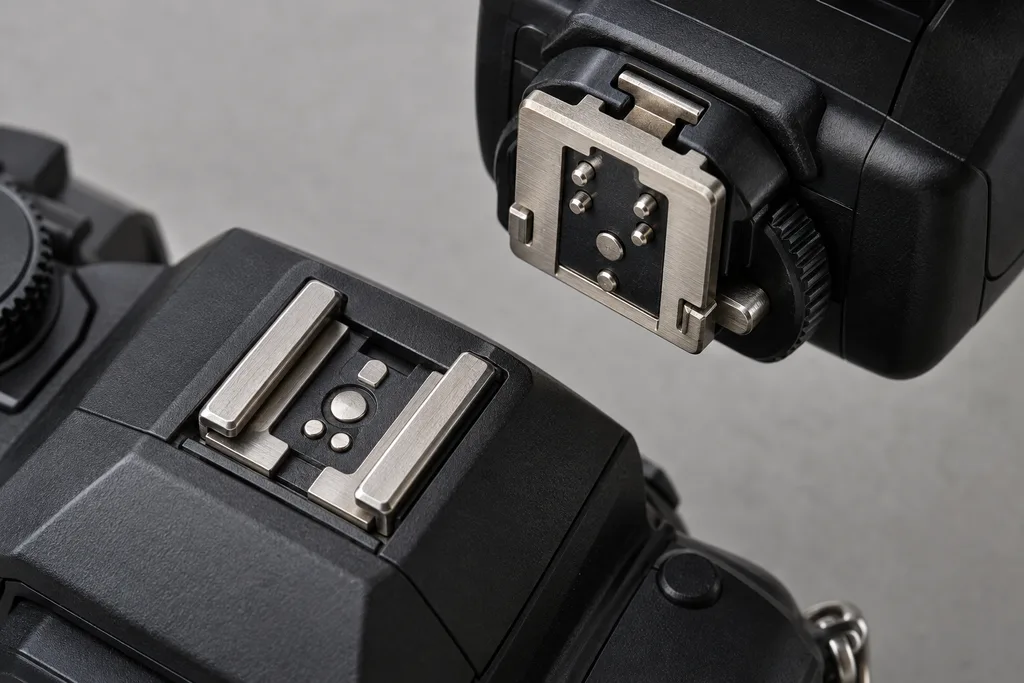
Under good light, inspect the camera shoe, mounting foot, rails, and contact pins. Look for loose debris, corrosion, bent pieces, or spring-loaded contacts that remain recessed. Remove loose dust with a hand blower while the equipment is off. Avoid metal tools, abrasives, scraping, and liquid sprayed into the shoe. If rain, condensation, or a drink reached the contacts, disconnect the equipment and let it dry completely in a ventilated place according to the manufacturer’s instructions. Flash units contain high-voltage capacitors that can retain hazardous energy, so the casing should remain closed.
A familiar physical shape does not guarantee electrical compatibility. Dedicated shoes may include a central trigger contact, auxiliary TTL contacts, digital communication pins, or revised multifunction interfaces. Cross-brand flashes and older adapters may fit mechanically while automatic exposure, wake-up, menu control, or triggering remains unsupported. Some combinations require a specific adapter or firmware level. An unidentified vintage flash also raises trigger-voltage concerns. Check the camera, flash, and adapter manuals before attachment; a universal safe-voltage figure cannot cover every body.
Check camera controls that can suppress flash operation
Open the camera’s flash-control menu and confirm that flash firing is enabled. Menu wording varies: look for entries such as Flash Firing, Flash Mode, External Flash Control, or a crossed-flash symbol. On the EOS R5, Canon documents a Flash Firing control and notes that disabling it can leave only the flash’s AF-assist function available. A powered flash may therefore appear responsive while exposure firing remains intentionally suppressed.
Review the selected flash mode as well. Flash Off suppresses output. Autoflash may fire only when the camera judges illumination or subject conditions to require it. Fill Flash generally requests firing for each eligible exposure. Slow Sync and Rear Sync alter timing and permitted shutter behavior. Availability can change with the exposure mode, scene preset, drive selection, or computational feature, so a greyed-out option provides useful diagnostic evidence.
Confirm that the camera is configured for still photography. Movie modes commonly apply different accessory rules, and some cameras cannot use a shoe flash for video recording. Then inspect the shutter selection. Silent shooting frequently engages a fully electronic shutter, and many camera models restrict flash in that state. The rule is body-specific: Sony documents flash as available with the mechanical shutter and unavailable with the electronic shutter on the α7 V, while Canon directs EOS R5 users to choose a shutter mode other than Electronic for flash photography. Other bodies may offer different combinations, including limited electronic-shutter support.
This setting is an especially common field trap. After covering a stage performance silently with available light, I may return to lobby stills while the electronic shutter remains active. The flash powers up, its ready lamp looks convincing, and the shutter releases normally, yet the camera intentionally sends no usable flash command.
Also disable modes that combine or process multiple frames, such as some HDR, panorama, focus-bracketing, anti-flicker, high-resolution, or special low-light modes. High-speed continuous drive may outrun recycling or restrict flash behavior. Choose single-frame drive for diagnosis. If the menu reports that an option is unavailable, note the exact message and current exposure mode. Consult the manuals for the precise body, flash, adapter, and installed firmware combination because similar menu names can conceal different restrictions.
Separate trigger failure from synchronization trouble
A flash that visibly emits light has passed one part of the trigger test. If the recorded frame is black, inspect exposure and timing before repeating hardware checks. A shutter speed beyond the supported synchronization range can produce a dark band or a partly lit frame because a curtain covers part of the sensor during the burst. Maximum sync speed varies by camera and shutter configuration; even one body may specify separate limits for mechanical and electronic-first-curtain operation.
Set an ordinary shutter speed comfortably within the value documented for your current shutter mode. High-speed sync can permit faster speeds only when the camera-flash combination supports and enables it. Effective flash output usually falls as shutter speed rises, which can make a correctly triggered flash appear weak at distance.
Rear or second-curtain synchronization delays the principal burst until late in a long exposure. A photographer watching immediately after the shutter press may think nothing happened. Autoflash may also decide that no burst is required. During rapid shooting, early frames can exhaust the available charge and later frames may receive reduced output or none while the unit recycles. Let the ready indication recover fully and test one exposure at a time.
Run a controlled isolation test
Once the fast checks are complete, simplify the system. Use a stationary subject in a safe indoor area, keep the flash away from reflective eyes and nearby faces, and record every change. A short sequence prevents one correction from being hidden by another setting.
- Install a matched, known-good battery set, attach the flash fully, lock it, and wait for its documented ready state.
- Select still-photo operation, single-frame drive, enabled flash firing, and a supported mechanical or electronic-first-curtain mode.
- Choose a normal exposure mode and a shutter speed within the body’s documented standard sync range.
- Press the flash test button when the manual permits it, then make one camera exposure and wait for complete recycling.
- Reset flash settings and camera flash settings only through documented reset commands, then repeat the same exposure.
The test button evaluates basic power, charging, and the flash’s ability to discharge under the current conditions. It does not evaluate the camera’s trigger path, shoe contacts, TTL protocol, or every safety interlock. Model details matter here too: Canon states that the EL-10 test flash is unavailable while the camera’s metering timer is active.
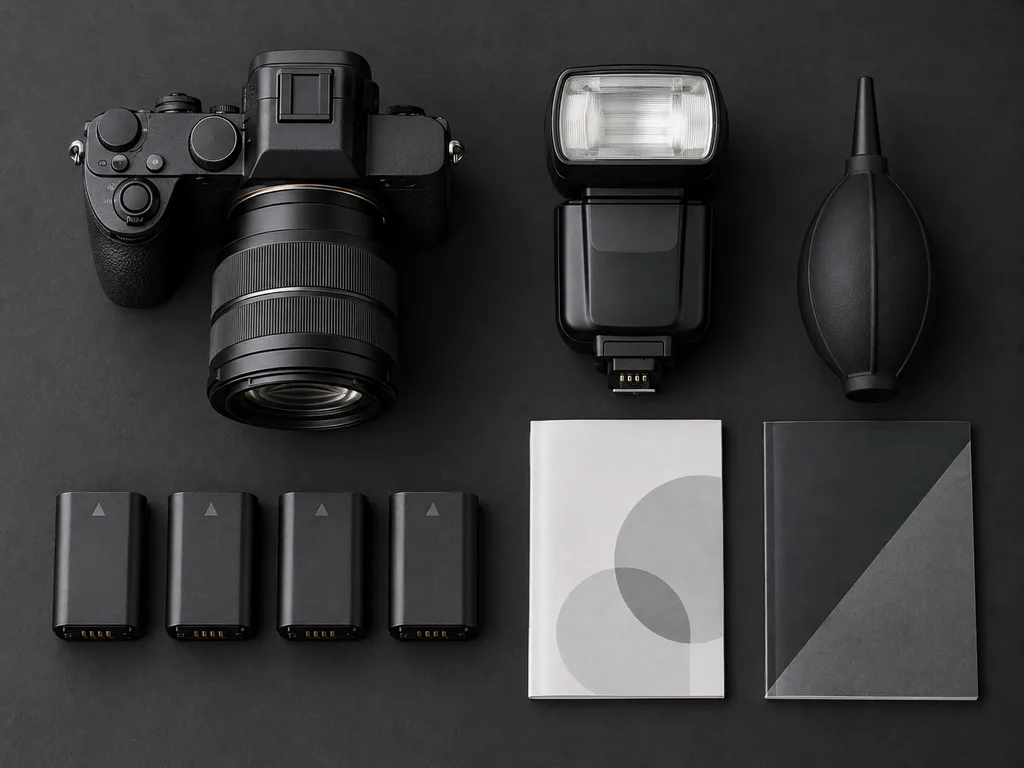
Watch whether the camera recognizes an attached external flash or exposes flash settings in its menu. Recognition suggests that some communication exists, although it cannot confirm every contact or function. If available, repeat the controlled setup with a second verified-compatible flash on the same body, or test the original flash on a second verified-compatible body. Change one component at a time. If two compatible flashes fail on one camera while both work elsewhere, the body or shoe becomes the leading suspect. If one flash fails across compatible bodies and known-good batteries, the evidence points toward the flash. Persistent intermittent behavior may still require professional inspection because movement can expose a damaged foot or shoe connection.
Frequently asked questions
Why does the test button work when the shutter cannot trigger the flash?
The flash can charge and discharge internally while the camera trigger path remains blocked by poor seating, incompatible contacts, disabled flash firing, an electronic shutter, or another shooting restriction. Test-button success narrows the diagnosis without clearing the camera, shoe, or communication system.
Does silent shutter disable an on-camera flash?
It does on many cameras when silent operation uses a fully electronic shutter. Some newer bodies provide different capabilities. Verify the shutter-mode table in the exact camera manual and test with a supported mechanical or electronic-first-curtain mode.
Can a high shutter speed stop the flash from firing?
The result depends on the system. Some combinations block an unsupported setting, some limit the shutter speed, and others fire with incomplete frame coverage. Supported high-speed sync extends the range while reducing effective output.
Why does the flash stop during a burst?
The requested frames may arrive faster than the flash can recycle. Battery voltage, output level, temperature, and protection logic all affect the sequence. Stop the burst, wait for readiness, and allow cooling whenever the manual or warning display requires it.
When should I check firmware or arrange service?
Check manufacturer firmware notes when the exact camera, flash, or adapter combination has a documented compatibility issue. Arrange service after controlled substitution produces a repeatable failure, or immediately following impact damage, corrosion, persistent errors, unusual heat, odor, smoke, or battery leakage.
Follow the evidence in a fixed order
Begin with batteries, compartment closure, readiness, recycle time, and temperature. Then reseat the foot, inspect dry contacts, confirm compatibility, enable camera-side firing, and leave restricted shutter or computational modes. Diagnose dark bands and weak burst sequences through synchronization and recycling. Finally, substitute one verified-compatible component at a time. If the fault remains repeatable, consult every exact model manual and seek qualified service without opening the flash or continuing tests through a heat, moisture, odor, or damage warning.