For a long time, the standard way to move film to digital was a dedicated film scanner or a flatbed. Lately more people copy film directly with a DSLR or mirrorless body. The results come faster, and the resolution is often higher than expected. The workflow is not simple, though, and your first attempt usually sends color drifting somewhere strange. Once you find the flow, copying a roll runs in half the time of a flatbed with double the resolution.
Gear: light, holder, macro lens
The core of DSLR film copying is three parts. A light panel that emits even light, a holder that keeps the film flat, and a macro lens that fills the frame with a single film image. The light panel should ideally have CRI 95 or higher. Low CRI distorts the spectrum, and color negative film cannot be cleanly corrected later. Avoid budget tracing pads that do not publish CRI.
Holders differ between 35mm and medium format 120. For 35mm, slide mounts or strip holders. For medium format, two pieces of glass sandwiching the film flat is common. Without a holder, the film bows microscopically and different parts of a single frame focus at different distances. Macro lenses ideally hit 1:1 magnification. 50mm and 100mm are common choices; 100mm gives more working distance, which helps lighting placement.
Camera settings: RAW, manual exposure
Shoot RAW. To pull film tone freely in post, RAW’s bit depth is necessary. JPEG breaks down immediately in the color inversion step. Keep ISO at the camera’s base setting to minimize noise. Aperture around f/8 is cleanest. Wide open softens corners on a macro lens; closed too far introduces diffraction. Shutter speed is set to match the light panel’s output.
White balance is best set as a custom mode against the light panel itself. Photograph just the panel without film, register that frame as the white balance reference, and every following film frame is copied against the same color baseline. For inverting color negatives in post, that consistency is decisive. A general primer on white balance and color is in this intro to color temperature and white balance.
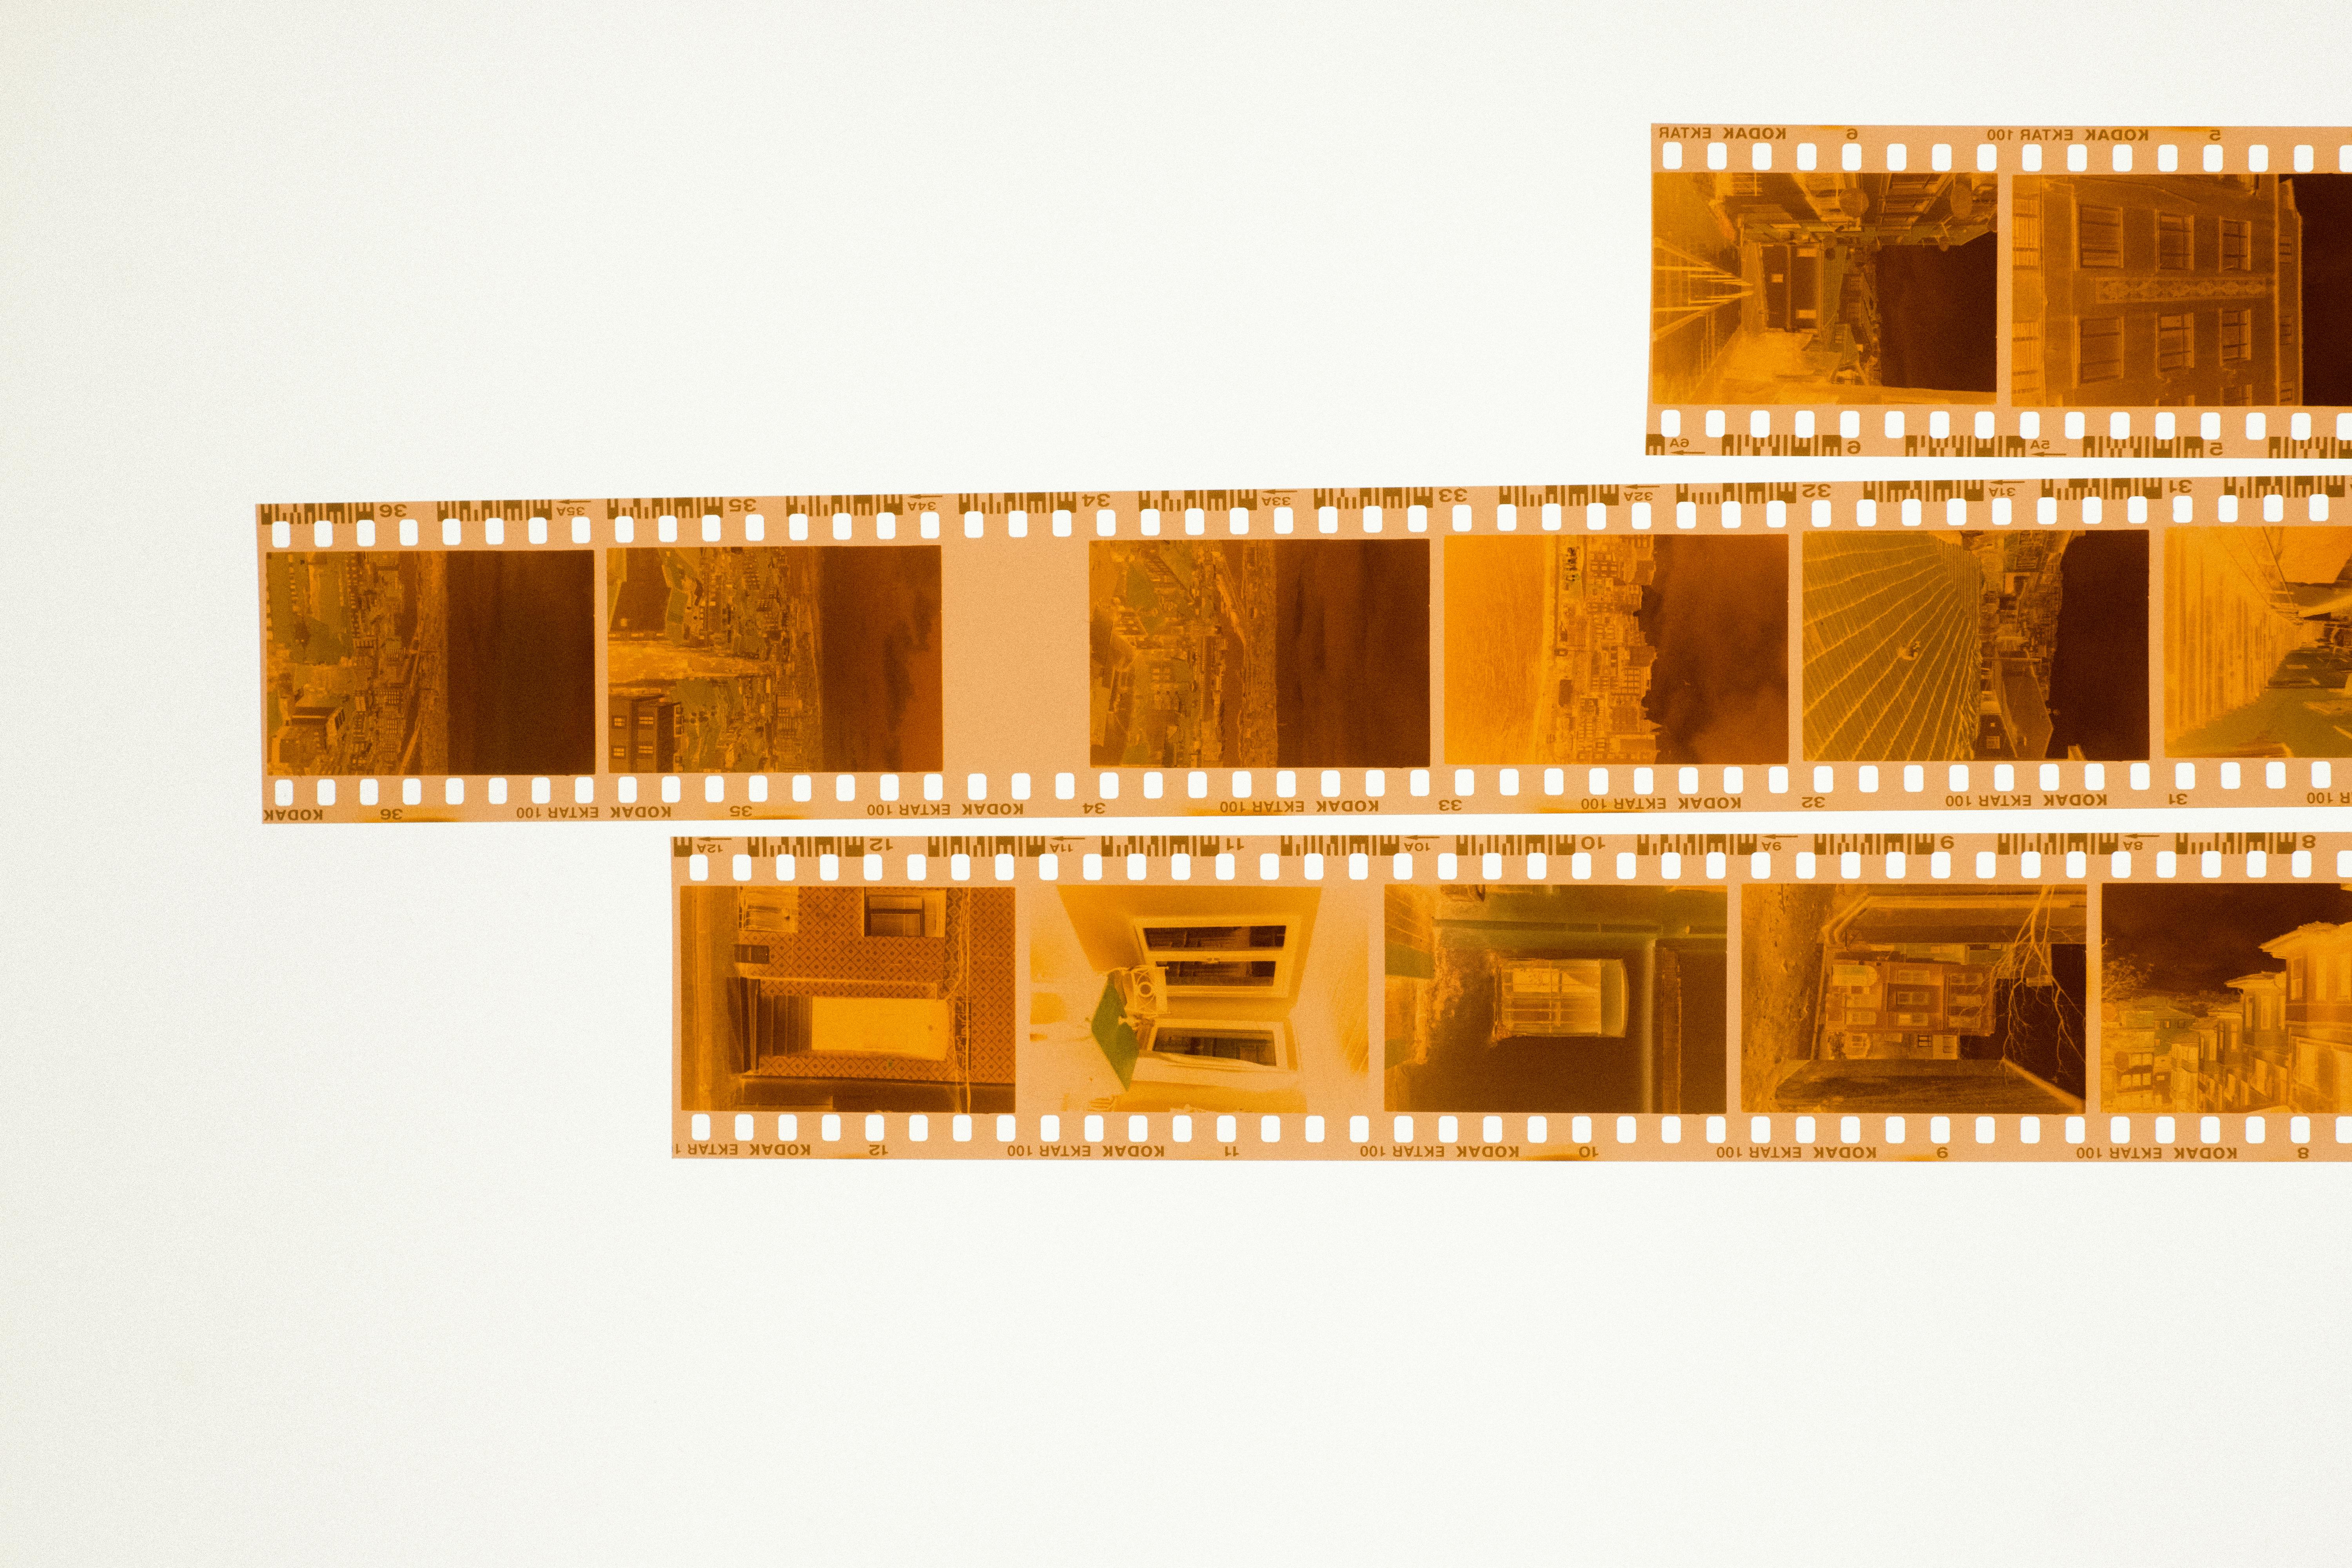
Dust: the enemy you can control
The biggest headache in film copying is dust. A single speck on the film becomes huge at 1:1. Removing dust frame by frame in post is the largest time cost. Brushing both sides of the film with an antistatic brush before scanning removes 90 percent of it. Working in a room with an air purifier running slows new dust from settling.
Color slides are easier; their dust marks are less obvious. Black and white negatives are harder; the transparent base shows dust clearly. For frequent black-and-white work, an antistatic brush is essential. Microscopic dust between the light panel and the film is another trap, so wipe the panel surface with a microfiber cloth before and after a session.
Why color negative inversion is hard
Slide film records colors as they appear, so post-processing is simple. Color negative is different. The base itself is covered in an orange mask, with the image laid in complementary colors on top of it. Press an invert button and the color drifts off somewhere. To unwrap it cleanly, the orange mask must be removed first, then per-channel tone curves inverted.
Plugins automate the work. Negative Lab Pro for Lightroom is the most common. Select the film stock and the plugin applies inversion curves matched to that film’s mask color. Kodak Portra, Fujifilm Pro 400H, Kodak Gold, all the popular stocks have presets. Far more stable than inverting by hand, and for anyone with a lot of color work, the single biggest time saver.
Resolution: the macro lens decides
Dedicated film scanners deliver around 4000dpi as standard. From one 35mm frame, that yields roughly 54 megapixels. Reaching that on DSLR copy requires a 45-plus megapixel full-frame body. With a lower body resolution, the workaround is to copy parts of the film at 1:1 and stitch. Splitting 35mm into nine sections and merging produces close to 200 megapixels even from a 24-megapixel body.
For ordinary print sizes this resolution is overkill. For large prints or digital preservation, it earns its place. The broader flow of moving old slides into digital is laid out in the note on bringing slides into the digital age, including a comparison of flatbed and DSLR copy and which suits which job.
Workflow: process in batches
Shooting and processing one frame at a time is heavy. Shoot one type of film for the whole session, then handle inversion in batch. Same film means the same mask color and tone characteristics, and inversion settings from one frame apply to all others. Lightroom’s sync function is well suited to this.
Start file organization at the very beginning. Group all frames from one roll into one folder, and name the folder with the film stock and approximate shooting date. Later, when finding a specific roll, metadata is what helps. EXIF from a digital camera does not carry film information, so include the stock as a keyword.
Once organized, an asset for life
Once an old film roll is well digitized, the same exposure and color settings do not need to be redone. So putting in the effort to nail down the environment and the workflow on the first session pays off forever. Light panel output, camera settings, white balance, post flow — set them once and they carry. A roll that took an hour at first eventually runs in 15 minutes, with a consistency that easily exceeds a flatbed scanner.
What film holds in its tone is something digital sensors struggle to mimic. Capturing that tone as cleanly as possible during digitization is the heart of the work. The tools are simple, but the work goes deep.
Color fading and the balance with preservation
Old film changes color over time. The magenta dye in color negatives goes first, then the cyan and yellow follow. Kodak color negatives from the 1980s now show a missing cyan, and slide films lean magenta depending on storage. Post can recover some of it, but past a certain chemical degradation the change is permanent. Digitization records the film at that moment in time; it does not restore the original moment of capture.
Once that distinction is accepted, the goal becomes clearer. Preserve as much data as possible and let post smooth the result. For badly faded film, accepting the marks of time often gives a more honest result than chasing a guess at the original. Family album photographs that look slightly faded carry the depth of time as part of the image.
Backup for failed work
If you fumble focus or set the wrong exposure while copying, the original film is still there to copy again. But if the film itself is old and degrading, one mistake becomes permanent loss. So a habit some keep is to shoot two or three exposures of each frame the first time around. More time, but a single session ends the work with a built-in backup. Digital files can be backed up in multiple locations and survive forever; original film cannot. Worth remembering at every step.
The last step of the film scan workflow is digital backup. Once you have a good copy, store it in two places: a cloud drive and an external disk. One copy in one place disappears the day that disk fails. The original film may still exist, but the time and cost of redoing the work is heavy. A digital file with one backup survives forever. Digitization completes its meaning at this last step, particularly for irreplaceable material like family photos.