Start at 1/1000 second for most field and court sports, then adjust from there. That is the simplest answer to the sports photography shutter speed question, but it is not the only answer. A runner jogging toward you, a tennis ball leaving a racket, a basketball player under dim gym lights, and a race car passing across the frame all need different decisions.
The goal is not always to use the fastest possible shutter speed. Sometimes you want freeze action photography with sharp faces, crisp uniforms, and a readable ball. Other times, especially in motorsports or cycling, a slower shutter and panning technique can show speed better than a perfectly frozen frame. Use the guidelines below as starting points, check your images at full zoom, and adapt to the sport, light, distance, and creative intent.
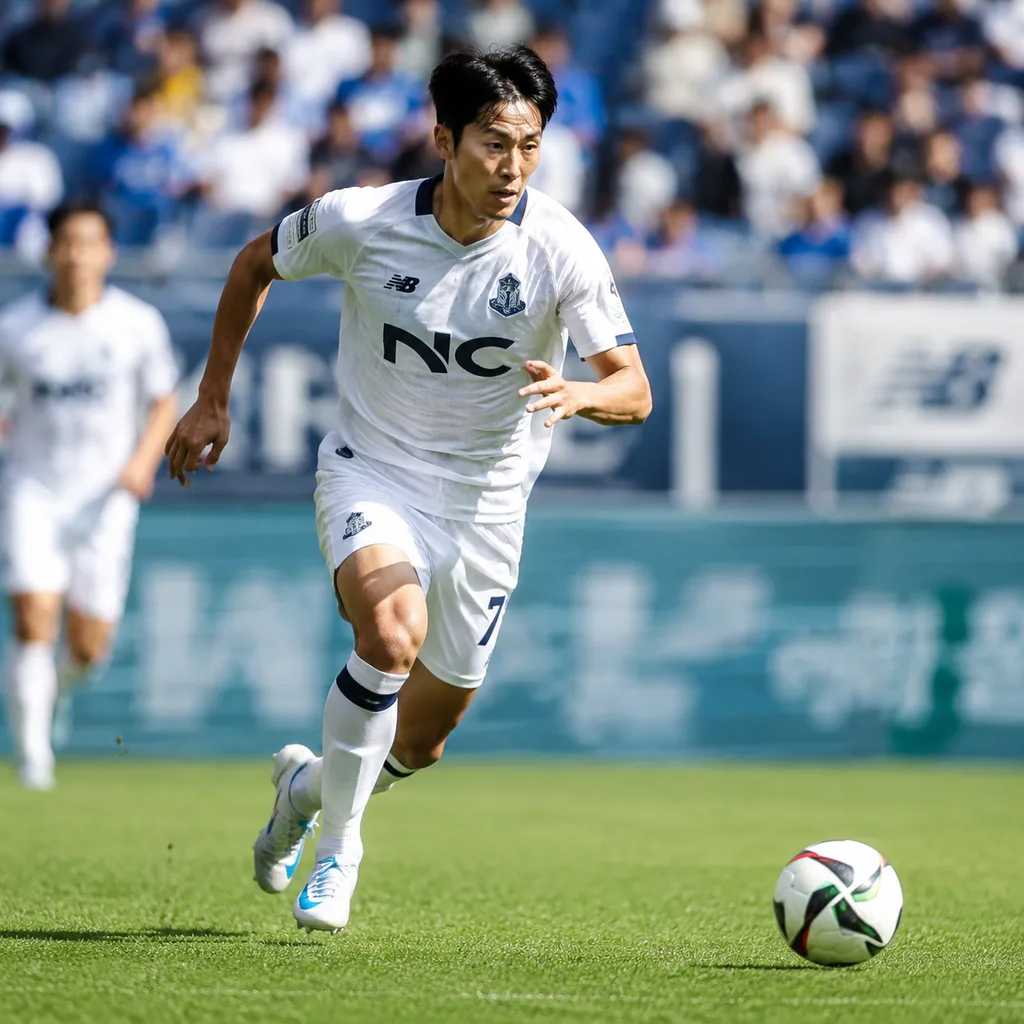
For many outdoor sports, 1/1000 sec is a safe first test frame, not a guaranteed final setting.
Quick Answer: The Best Shutter Speed for Sports Photography
There is no single perfect sports photography shutter speed, but these quick rules will get you close:
- 1/500 sec: usable for slower movement, posed moments, celebrations, warmups, and athletes who pause briefly.
- 1/800–1/1000 sec: a practical target for basketball, volleyball, soccer, football, lacrosse, running, and general action.
- 1/2000 sec or faster: useful for fast horizontal movement, baseball swings, tennis contact, water splashes, sticks, bats, balls, and peak sprinting.
- 1/15–1/60 sec: a creative range for panning sports photography when you want a sharper subject against a blurred background.
If you are unsure, begin at 1/1000 sec, shoot a short burst, review the athlete’s face, hands, feet, and the ball, then increase or decrease the shutter speed based on what you see.
Why Shutter Speed Matters More Than Any Other Setting in Sports
Shutter speed controls how long the camera sensor records light. In sports, that time window also determines how far the subject moves during the exposure. If a player’s face, hands, ball, or wheels travel too far while the shutter is open, the result is motion blur.
Aperture and ISO are still important, but in sports camera settings they often support the shutter speed. You open the aperture or raise ISO because you need enough light to keep the shutter fast. A perfectly exposed photo at 1/250 sec may still be unusable if the athlete is blurred through the decisive moment.
Subject motion, camera shake, and missed focus are different problems
Not every blurry sports photo is caused by a slow shutter. Blur can come from three common sources:
- Subject motion: the athlete, ball, or equipment moved too far during the exposure.
- Camera shake: your hands or lens movement softened the entire frame.
- Autofocus failure: the shutter speed was fast enough, but the camera focused on the background, another player, or the wrong body part.
If the background is sharp but the player’s limbs are smeared, use a faster shutter. If nothing is sharp, check camera shake or focus. If the jersey behind the athlete is sharp but the face is soft, your autofocus technique is the likely issue.
Movement across the frame needs more speed
A subject running directly toward you may look sharp at a slower shutter than a subject sprinting left to right across the frame. Side-to-side motion travels quickly across the sensor, so it often needs 1/1000, 1/1600, or 1/2000 sec. This is why shutter speed for soccer photography can change from one play to the next: a player jogging toward goal is different from a winger crossing the frame at full speed.
Sports Photography Shutter Speed Cheat Sheet
Use this table as a field reference. These numbers are starting points, not guaranteed results. Light level, lens focal length, distance, athlete speed, and autofocus performance all matter.
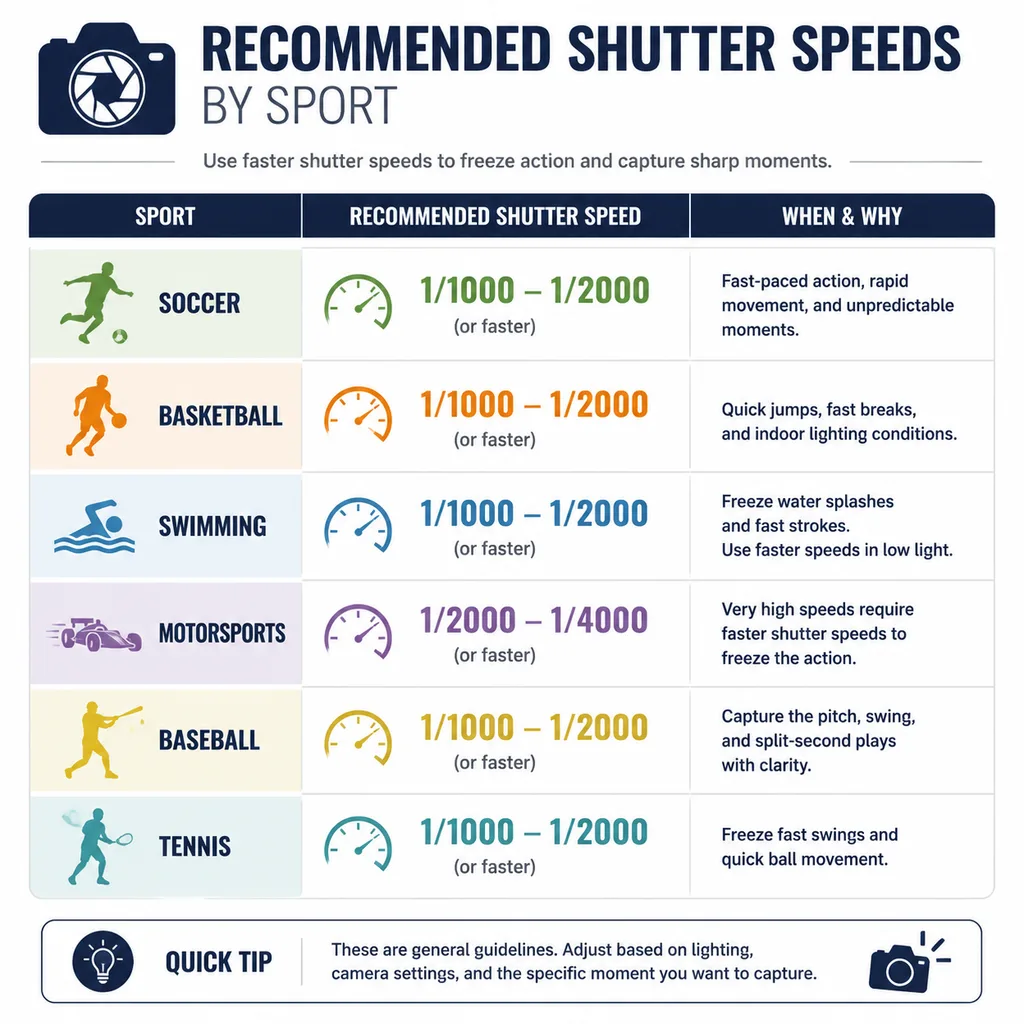
| Sport or situation | Starting shutter speed | Practical note |
|---|---|---|
| Youth soccer, football, lacrosse in daylight | 1/1000–1/2000 sec | Use the higher end for sprinting and tackles. |
| Basketball or volleyball indoors | 1/500–1/1000 sec | Try for 1/800 or faster if the gym light allows. |
| Track, running, cross-country finish | 1/1000–1/2000 sec | Fast arms and legs often need more speed than the torso. |
| Baseball or tennis ball contact | 1/2000–1/4000 sec | Ball, bat, and racket motion are extremely fast. |
| Swimming strokes and splashes | 1/1000–1/2000 sec | Use faster speeds to hold water droplets sharply. |
| Motorsports, frozen action | 1/1000–1/2000 sec | Good for sharp cars, bikes, and track details. |
| Motorsports panning | 1/30–1/125 sec | Adjust to vehicle speed, distance, and lens length. |
| Creative motion blur | 1/15–1/60 sec | Use when energy matters more than full sharpness. |
Start at 1/1000 Second, Then Adjust
Canon’s sports photography guidance points photographers toward 1/1000 sec or faster for freezing many types of action. That is a strong baseline because it works across a wide range of outdoor sports and many well-lit indoor scenes.
When 1/500 is enough
1/500 sec can work when the athlete is not moving quickly through the frame. Examples include a golfer before the swing, a pitcher holding at the set position, a player celebrating, a coach on the sideline, or a runner slowing after the finish. It can also be acceptable when you are shooting wider and the subject occupies a smaller part of the frame.
When you need 1/2000 or faster
Move above 1/1000 sec when the important detail is very fast: a baseball bat at impact, a tennis racket meeting the ball, a volleyball spike, a swimmer’s splash, a hockey stick, or a sprinter’s feet. Also increase speed when the athlete is close to you and moving across the frame, because close subjects cross the image faster than distant ones.
Why 1/1000 can still look soft
If 1/1000 sec still looks soft, do not automatically blame shutter speed. Your autofocus may have slipped, the lens may be near its weakest aperture, the subject may be too close and fast, or high ISO noise reduction may be smoothing fine detail. Some body parts also move faster than others. A runner’s torso may be sharp while the feet blur slightly, even at a fast shutter.
Outdoor Sports Shutter Speed Settings
Outdoor sports give you the most flexibility. In bright sun, you can often shoot at 1/1000 or 1/2000 sec while keeping ISO relatively low. The challenge is that the light changes quickly as clouds pass, athletes move into shade, or the game continues into dusk.
Daylight field sports
For soccer, football, rugby, lacrosse, baseball, and track in good daylight, start around 1/1000 sec, f/4–f/5.6, Auto ISO. If faces and feet are sharp, you can stay there. If the ball or limbs blur too much, move to 1/1600 or 1/2000 sec. If you need more background separation, open the aperture, but keep enough depth of field for the play.
Overcast or late-afternoon games
Cloudy light is softer and often more flattering, but it costs exposure. ISO 800 or 1600 is normal for overcast outdoor sports, and higher may be needed near sunset. Do not hold ISO at 100 if it forces you down to 1/250 sec for active play. A little noise is usually easier to repair than motion blur.
Night games under stadium lights
Night football, soccer, and baseball can be difficult because stadium light may be uneven. Aim for 1/1000 sec if possible, use your widest practical aperture, and allow ISO to rise. If the image becomes too noisy, test 1/800 sec and time your shots for peak action, where the athlete briefly changes direction or reaches the top of a jump.
Indoor Sports Shutter Speed Settings
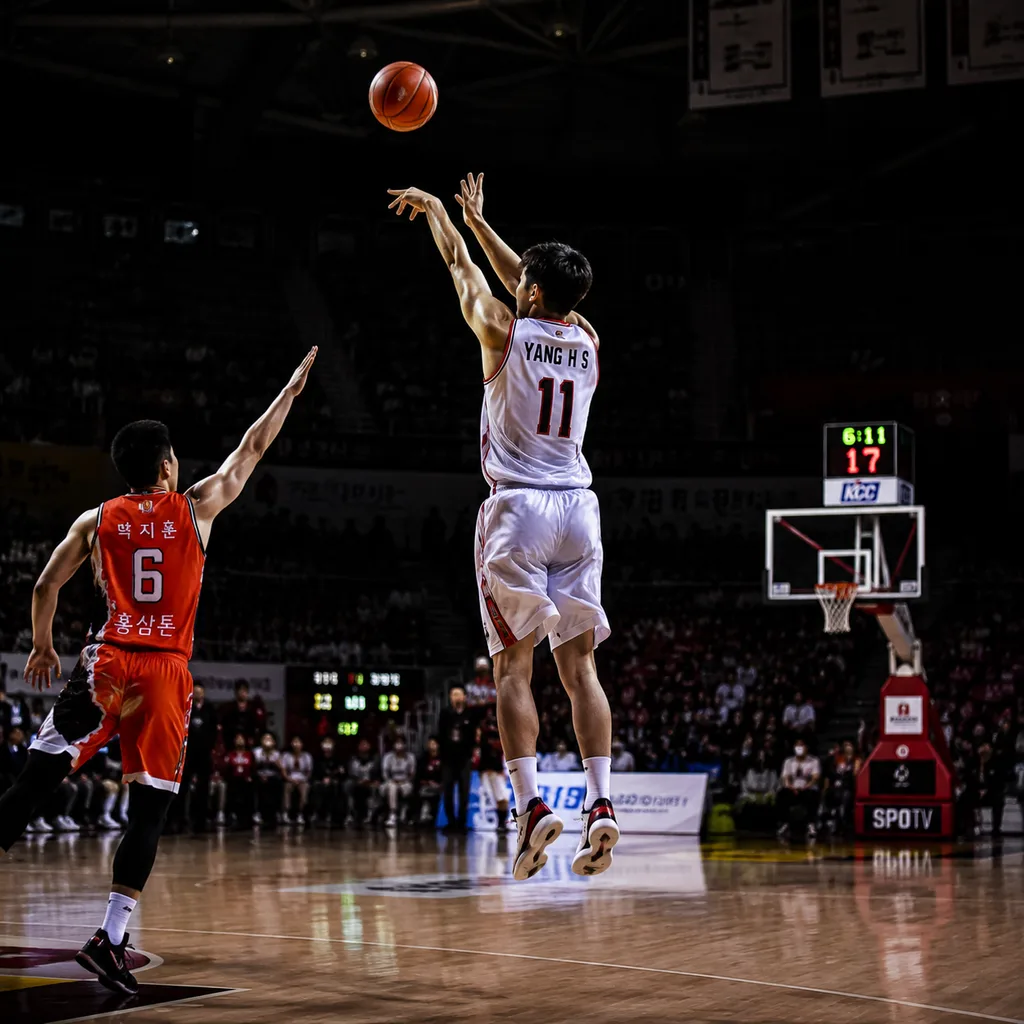
Indoor sports photography settings are harder because gym lights are much dimmer than they appear to your eyes. Basketball, volleyball, gymnastics, wrestling, and indoor swimming often require a wide aperture and high ISO just to reach 1/500–1/1000 sec.
Basketball and volleyball
For shutter speed for basketball, start at 1/800 sec if your lens and ISO allow it. If the gym is very dark, 1/500 sec may be your minimum compromise, especially for youth games. Volleyball spikes and blocks often benefit from 1/1000 sec, but the light may force you to choose between noise and blur.
Gymnastics and wrestling
Gymnastics can require very fast speeds during tumbling but slower speeds during holds and balances. Wrestling often happens in lower light with quick bursts of movement, so 1/500–1/800 sec is a realistic starting range. Watch for peak moments when the motion briefly slows.
Dealing with high ISO noise
Modern cameras handle high ISO better than many photographers expect. If ISO 6400 or 12800 keeps your shutter speed high enough to capture the moment, use it when necessary. Noise can often be reduced in editing; severe subject blur usually cannot.
Freeze the Action or Show Motion?
Sharp action is powerful because it reveals expression, muscle tension, sweat, water, and ball contact. But a completely frozen frame can sometimes make a fast sport look static. Your shutter speed should match the story you want the photo to tell.
Freezing action with fast shutter speeds
Use fast shutter speeds when the key information must be readable: the player’s eyes, the ball on the foot, the bat meeting the pitch, or the swimmer’s hand entering the water. This is the safest approach for editorial, team, parent, and portfolio coverage where recognizable athletes and decisive moments matter.
Panning with slow shutter speeds
Panning uses a slower shutter while you move the camera with the subject. The goal is a relatively sharp subject with a streaked background. Nikon’s panning advice emphasizes matching your camera movement to the subject and choosing shutter speed based on speed, distance, and the amount of blur you want.
For motorsports or cycling, start around 1/60 sec. If the background is not blurred enough, try 1/30 or 1/20 sec. If the subject is too soft, move toward 1/125 sec and practice smoother tracking.

Follow through after pressing the shutter
Good panning starts before you press the shutter and continues after the frame is captured. Pick up the subject early, rotate smoothly from your hips, press the shutter gently, and keep following the subject after the burst. Expect a low keeper rate at first; panning improves through repetition.
How Aperture and ISO Support Your Shutter Speed
Fast shutter speeds reduce the amount of light reaching the sensor. To maintain exposure, you must open the aperture, raise ISO, add light where allowed, or accept a darker frame.
Use a wide aperture when light is low
A lens at f/2.8, f/2, or f/1.8 lets in more light than a kit zoom at f/5.6. That can be the difference between 1/250 and 1/1000 sec indoors. The tradeoff is shallower depth of field, so your autofocus accuracy becomes more important.
Let Auto ISO do the heavy lifting
Two practical exposure setups work well for sports. In Shutter Priority, you choose the shutter speed and the camera adjusts aperture and ISO if Auto ISO is active. In Manual mode with Auto ISO, you lock the shutter and aperture while the camera changes ISO as light shifts. If exposure indicators confuse you, reviewing reading the exposure dial can make these choices easier in the field.
Accept some noise before accepting motion blur
For action, a noisy sharp image is usually more valuable than a clean blurry image. Do not raise ISO carelessly, but do not fear it when the moment requires speed. Use noise reduction later, expose as accurately as possible, and prioritize the athlete’s expression and body position.
Camera Mode Recommendations for Sports Shutter Speed
Shutter Priority mode
Shutter Priority is beginner-friendly because it puts the most important setting first. Dial in 1/1000 sec for outdoor action or 1/800 sec for a gym test shot, enable Auto ISO, and watch whether the camera hits aperture or ISO limits.
Manual mode with Auto ISO
Manual with Auto ISO is excellent when the action is consistent but the background brightness changes. For example, at an outdoor soccer match, you might set 1/1600 sec and f/4, then let ISO adjust as players move between sun and shade.
Burst mode and buffer limits
Burst shooting helps capture peak action, but long bursts can fill the camera buffer. A fast card can help the camera clear files more quickly, so memory card speed ratings matter more for sports than many beginners realize. Use short, intentional bursts instead of holding the shutter through every play.
Shutter Speed Is Not the Same as Autofocus
A fast shutter cannot rescue a frame focused on the wrong player. For moving athletes, use continuous autofocus, often labeled AF-C or Servo AF depending on the camera brand. Subject tracking can help, but it still needs good technique and a sensible focus area.
Use continuous autofocus for moving athletes
Single-shot AF is designed for subjects that stop. Sports rarely stop. Use continuous AF, choose a focus area that matches the sport, and keep the active point on the athlete before the decisive moment. If you want a deeper explanation, see this guide to autofocus modes.
Track early, shoot through the moment
Do not wait until the player is already kicking, jumping, or swinging to begin focusing. Track early, let the camera predict movement, and shoot through the peak. Practicing tracking moving subjects will improve sharpness as much as changing shutter speed.
Common Mistakes With Sports Photography Shutter Speed
- Expecting 1/250 sec to freeze sprinting athletes. It may work for sideline moments, but active play usually needs more speed.
- Refusing to raise ISO indoors. Low ISO is not helpful if it forces motion blur.
- Ignoring direction of movement. Fast motion across the frame often needs a faster shutter than motion toward the camera.
- Confusing focus errors with shutter speed errors. Check whether the wrong object is sharp before changing exposure settings.
- Assuming electronic shutter is always best. Electronic shutter can enable fast bursts, but rolling shutter distortion, LED banding, and flash sync limits can appear. Learn the differences between mechanical and electronic shutter types.
- Trying panning once and quitting. Slow-shutter sports images require practice and many attempts.
If you use flash for sports, confirm that it is allowed and safe for the athletes. Also remember that normal flash sync speeds such as 1/200 or 1/250 sec may be too slow for action unless you use high-speed sync, and that technique has its own power and range limitations.
Practical Starting Settings for Your Next Game
- Outdoor daylight soccer: 1/1000 sec, f/4–f/5.6, Auto ISO. Increase to 1/1600 or 1/2000 for sprints and tackles.
- Indoor basketball: 1/800 sec, widest practical aperture, Auto ISO. Drop to 1/500 only if the gym is too dark.
- Baseball swing or tennis contact: 1/2000 sec or faster if light allows, with continuous AF and short bursts.
- Swimming: 1/1000–1/2000 sec for strokes and splashes; watch reflections and changing pool light.
- Motorsports pan: 1/60 sec, continuous AF, burst mode, smooth follow-through. Adjust faster or slower after reviewing results.
- Night football: target 1/1000 sec, use f/2.8 if available, and allow high ISO rather than letting action blur heavily.
Final Takeaway: Choose the Shutter Speed That Matches the Moment
The safest sports photography shutter speed starting point is 1/1000 sec, but it is not the only answer. Use 1/500 sec for slower or paused moments, 1/2000 sec or faster for very fast details, and 1/15–1/60 sec when you intentionally want motion and energy through panning.
At your next game, take a test burst, zoom in on the athlete’s face, hands, feet, and the ball, then adjust. Check exposure, accept reasonable ISO when needed, and remember that autofocus and timing are part of sharp sports photography too.