Scanning film at home has become a normal workflow for people shooting it again. The lab still exists, but turnaround is slower than it used to be and the cost per roll has risen to the point where doing the digital conversion yourself starts to make sense. The hardware is also cheaper and better than it was. A flatbed scanner from a decade ago for several hundred dollars now sells for less than half that, and a digital camera plus a film holder produces results that compare well to dedicated scanners costing more.
The trouble is that two of the most common film formats, colour negative and slide, behave very differently when you try to scan them. Treat them the same way and one will look right and the other will look strange. The differences come from how the films are designed to be viewed, not from any property of the scanning process.
What slide film does that colour negative does not
Slide film, also called reversal or transparency film, is designed to be the final image. You hold it up to a light, or project it, and what you see is what the film recorded. The colours are positive, the densities are correct, and the dynamic range, while limited, is correct. A correctly exposed slide looks correct.
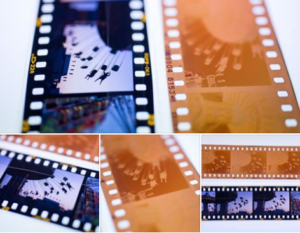
Colour negative film is not the final image. It is a master that prints make from. The colours are inverted. The film also has a strong orange cast, called the orange mask, which is part of how the dye couplers compensate for impurities in the cyan and magenta dyes. The mask makes the negative usable for printing on colour paper, but it makes the raw scan of a colour negative look orange and impossible to read directly.
Inverting the colour negative scan and removing the orange mask is the entire point of colour negative film conversion. Get it right and the result is the image the film recorded. Get it wrong and the image has weird colour casts that no amount of white balance correction can really fix, because the orange mask is non-linear and varies between film stocks.
Why one piece of software is not enough
Software for colour negative conversion has come and gone over the years. Negative Lab Pro is the current standard for Lightroom users. Grain2Pixel is a free Photoshop plugin that does similar work. Most flatbed scanner software, like SilverFast, has built-in negative profiles for common film stocks. The profiles do not always match the film you actually shot, and tweaking them by eye is part of the workflow whether you like it or not. A more detailed walk through current film negative conversion workflows and software options covers the available tools in more depth. A useful side discussion of the C-41 development chemistry and its colour mask explains why the orange cast exists in the first place.
Slide film does not need conversion software in this sense. The scan, white-balanced correctly to the light source, is the final image. The scanner or camera reads the slide, applies a colour profile if you have one, and you are done. The colour fidelity depends on the scanner and the light, not on a piece of inversion software making decisions about what the image should look like.
Flatbeds, dedicated scanners, and the camera method
Three approaches are common for home film conversion. Flatbed scanners, like the Epson V600 or V850, take a long time per frame but handle multiple sizes from 35mm up to 4×5 sheet film. The resolution is adequate for web use and small prints, but the optics are not strong enough to extract everything the film holds, and at large print sizes the limitations show.
Dedicated film scanners, like the Nikon Coolscan or Pakon 135 series, are no longer manufactured but still circulate on the used market. They produce significantly better results from 35mm than flatbeds do, and the colour conversion software bundled with them was good enough that some users still maintain the original PCs needed to run it. Prices vary widely depending on condition and accessory availability.
The camera method uses a digital camera with a macro lens to photograph the film over a backlight, often through a dedicated film holder. The Negative Supply, Valoi, and Essential Film Holder products are the current generation of accessory. The camera captures one frame at a time, the file goes into the same conversion software you would use for any scan, and the result is usually as good as a dedicated film scanner and sometimes better, depending on the sensor and lens used.
What changes between the methods
For slide film, the differences between methods are mostly about resolution and the colour accuracy of the light source. A flatbed with a built-in transparency unit produces consistent colour but at lower resolution. A camera scan with a properly calibrated daylight LED produces higher resolution but with whatever colour accuracy the light source provides. Calibrated light sources are a niche accessory market that has grown alongside the camera scanning workflow.
For colour negative, the differences compound. A bad light source on a colour negative scan makes the inversion software’s job harder, because the colour cast from the light interacts with the orange mask in ways that are difficult to undo. Camera scanners using a low colour-accuracy light source often produce colour negatives that look subtly wrong in a way that is hard to identify. Slide scans from the same setup look fine, because there is no inversion stage to compound the error.
Resolution and what is actually on the film
A 35mm frame of fine-grained slow film, like Kodak Ektar 100 or Provia 100F, holds the equivalent of about 20 to 24 megapixels of usable detail when scanned at maximum quality. Fast film holds less, because the grain is larger and the visible detail is limited by the grain size. Pushing the scan resolution past what the film actually holds gains nothing but file size.
A flatbed scanner advertised at 6400dpi for 35mm film is not actually resolving 6400dpi worth of detail. The optics are usually limited to around 2400dpi of real resolution, sometimes less. The extra advertised resolution is the scanner sampling more often than its optics can distinguish, which produces larger files without more information. Dedicated film scanners typically resolve closer to their advertised numbers. Camera scans depend on the sensor’s pixel pitch and the macro lens’s resolving power, and high-end camera setups can extract everything a 35mm frame actually contains.
Medium format and the easier case
Medium format negatives and slides, at 6×4.5 or 6×6 or 6×7 centimetres, contain so much more detail than 35mm that the scanning bottleneck rarely matters. A flatbed scanner at its real resolution will extract most of what a 6×6 frame holds, especially for negatives where the inherent contrast range is large but the resolution requirements are modest. The orange mask issue still applies, but the larger frame area means even modest scanners produce results that hold up at large print sizes.
For medium format slide film, the case is even easier. A flatbed scan of a 6×7 transparency is usable at any reasonable print size, and the inversion problem does not exist. Many medium format shooters use a basic flatbed not because it is the best option but because it is good enough and the alternatives are not worth the additional cost. A side-by-side walkthrough of camera scanning technique at home covers the result quality at various budget points. The hardware question of adapting an enlarger lens or odd macro lens to a digital body comes up often in the camera scanning workflow.
The reading
Slide and negative scanning have different problems, and the problems shape which method is worth using. For slides, the bottleneck is usually resolution and colour accuracy of the light source, and the camera method has become the preferred answer for serious work. For negatives, the bottleneck is the inversion stage, and the choice between flatbed, dedicated scanner, and camera method depends as much on the conversion software as on the hardware.
If you are deciding between methods, the question is not which produces the highest absolute quality. It is which produces consistent enough quality to feel worth the time for the volume you actually shoot. The dedication required to maintain a Coolscan and its software is significant. The dedication required to camera-scan a roll with a good macro lens and a properly calibrated holder is significant in a different way. The flatbed is the lowest-effort option, and for many photographers the results are adequate and the time saved is worth more than the additional quality. The right answer depends on what you intend to do with the resulting files. Our notes on scanning film with a DSLR go into the camera-scanning workflow in more depth.