Late one evening after a documentary shoot, I placed a strip of medium-format negatives above a small light panel and lowered a mirrorless camera on a copy stand. The first frame looked convincing at screen size, yet magnification revealed dust, a soft right edge, and a faint band across the sky. Those flaws described the scanning station more clearly than the photograph.
Learning how to scan 120 film at home without a dedicated film scanner means controlling a compact reproduction setup: film position, camera alignment, transmitted light, exposure, focus, and conversion. Each variable is manageable with equipment many photographers already own. The following workflow is designed for repeatable one-shot captures, with stitching available when a particular negative and output size justify the extra work.
What does camera scanning do with 120 film?
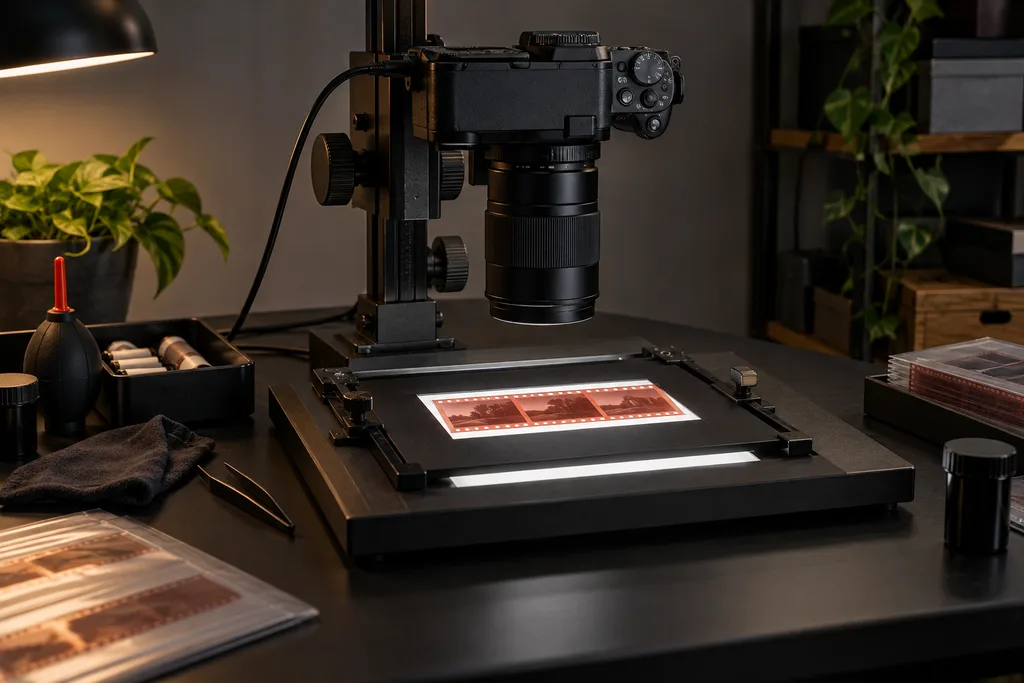
Camera scanning is macro photography of a backlit piece of film. A digital camera records the negative or transparency as a RAW image, and software handles inversion, color, tone, cropping, and cleanup. The camera and lens provide the image capture, a stand replaces the scanner’s transport mechanism, a light panel supplies illumination, and a holder controls the film.
The correct name is 120 film or 120 roll film. “120mm film” is inaccurate because 120 is a format designation. Depending on the camera, one roll can contain nominal 6×4.5, 6×6, 6×7, 6×8, or 6×9 frames. Actual image dimensions vary slightly among cameras.
That generous film area affects the entire arrangement. A one-shot capture requires lower magnification than copying a 35mm frame onto the same sensor, while the holder must support a much wider strip. Any curl, bow, or tilt can move part of the emulsion outside the lens’s narrow plane of focus. Nikon’s overview of digitizing film with a camera and backlight explains the underlying method, although its ES-2 accessory concerns 35mm film rather than 120.
Which equipment do I genuinely need?
A workable system has four essential parts: a RAW-capable digital camera, a suitable close-focus lens, stable support, and an even transmitted-light source. It also needs a 120 film holder that keeps the image area flat without rubbing it. A remote release, two-second timer, or compatible electronic shutter reduces vibration. Add a hand blower and clean lint-free gloves so fingerprints and loose dust never become editing problems.
An interchangeable-lens DSLR or mirrorless camera is convenient, although sensor size alone does not determine quality. The useful figure is how many sensor pixels cover the film image after cropping. Measure the holder opening and the active frame instead of assuming that every 6×7 negative has identical dimensions. Divide sensor width by the film width when both use the same units to estimate the required reproduction ratio. For example, fitting a roughly 70 mm frame width onto a 36 mm sensor width calls for a ratio close to 0.5×. Consequently, 1:1 reproduction is not a universal requirement for a single 120 capture.
A true macro lens is usually easiest because it focuses closely and tends to hold detail across a flat subject. An enlarging lens or another well-corrected, flat-field-capable lens can also work when mounted securely at the required distance. Test the lens you have before buying a replacement. Inspect grain at the center and all four corners, and try several apertures.
Choose a light source for evenness, repeatability, diffusion, and spectral behavior. A high-CRI panel is a sensible starting point for color film, though its CRI number cannot describe every spectral gap or color-conversion issue. A rigid copy stand makes height and alignment easy to repeat. A carefully secured tripod can work if its center column or head places the camera directly over the film without flexing.
How do I keep the film flat and the camera aligned?
Treat the station as a small tabletop reproduction set. Place the light on a stable surface, add diffusion if individual emitters or brightness patterns remain visible, and support the holder above the light by enough distance for the illumination to blend. More separation can improve uniformity, provided the structure stays rigid and stray light cannot reach the lens.
Load the film with clean hands in gloves, touching only the edges. The carrier should restrain the strip along its borders while leaving the photographed area unobstructed. Curled film sometimes needs a holder with greater edge tension or a longer section of the strip supported on both sides. Glass introduces cleaning demands, extra reflections, possible Newton rings, and potential contact with the emulsion, so it deserves careful testing before use.
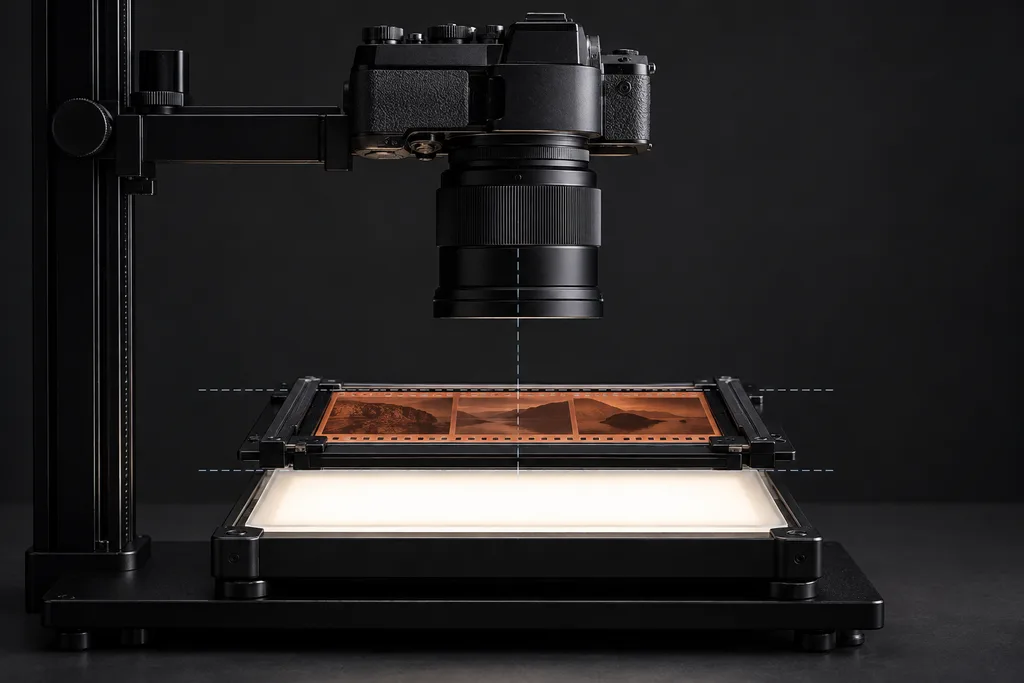
Next, make the camera sensor plane parallel to the film plane and center the lens above the frame. A small mirror placed flat in the carrier can help: adjust the camera until the reflected lens appears centered in the live-view image. Remove the mirror before loading film. A bubble level can establish a starting point, although it cannot detect every difference between the camera body, sensor, holder, and work surface.
Confirm alignment with an actual negative. Focus near the center, then inspect visible grain at all four corners under high live-view magnification. When one edge is consistently softer than the opposite edge, suspect tilt before changing lenses or sharpening settings. I have seen a seemingly minor stand adjustment move one side far enough from the focus plane to spoil corner grain.
Mask exposed parts of the light panel with matte black card and shade the area around the holder. Turn off nearby lamps that reflect in the film or lens, remove unnecessary lens filters, and use a hood when it does not cast a shadow. Stray light lowers contrast and can become a colored veil after inversion. Finally, photograph the illuminated opening without film and inspect the result for gradients, bands, or visible LED structure.
Which camera settings produce a repeatable capture?
Record RAW files at the camera’s base ISO and select manual exposure. RAW preserves greater adjustment latitude for inversion, white balance, channel correction, and highlight recovery. Manual settings also prevent adjacent frames from receiving unexplained brightness changes that complicate batch conversion.
Begin aperture testing around f/8. A useful practical range is f/5.6 through f/11, depending on the lens, sensor pixel pitch, magnification, film flatness, and diffraction. Wider settings may expose field curvature or reduce depth of field; smaller settings can soften fine grain through diffraction. Capture the same detailed negative at several apertures and compare the center and corners at equal viewing size.
Focus manually on grain or the finest recorded detail using highly magnified live view. Focus peaking can help locate the plane, yet it is too broad to serve as the final judgment. Recheck focus after changing camera height, aperture, holder tension, or film orientation. On a DSLR, live view can avoid mirror movement. On either camera type, a delayed release, remote trigger, or suitable electronic shutter helps reduce vibration, although some electronic shutters can interact with flickering LEDs. A test series will reveal banding.
Expose strongly enough to use the available RAW levels while protecting the brightest captured color channel from clipping. A color negative’s orange base can push channels apart, so a combined luminance histogram may conceal channel clipping. The in-camera histogram is generated from a processed preview and therefore remains a guide instead of a guarantee about untouched RAW data. Review the RGB histograms, leave a modest safety margin, and verify questionable files in RAW software.
If lighting and film density permit, maintain one exposure across a roll. Consistency makes batch inversion easier and preserves meaningful differences between neighboring frames. Exceptionally dense or thin frames can receive individual exposures, which should be recorded with the file numbers. After long production days, I note aperture, camera height, shutter speed, ISO, light setting, holder configuration, and emulsion orientation; those notes make later rolls much easier to reproduce.
A short pre-capture check prevents most wasted sessions:
- Clean the film, holder, lens, and light surface.
- Confirm flatness, parallel alignment, framing, and corner focus.
- Lock RAW, base ISO, aperture, white balance, and manual exposure.
- Inspect the first capture for clipping, vibration, flare, and dust.
How should I convert negatives and transparencies?
Black-and-white negatives are the simplest starting point. Invert the tonal curve, establish black and white points without crushing useful detail, and adjust the midtones. A monochrome conversion prevents residual camera color from affecting the finished image. Traditional black-and-white film may still show base density, development unevenness, or staining, so a simple inversion can require local tonal work.
Color negatives include an orange film base and unequal channel responses. Conversion therefore involves inversion, channel balancing, a starting white balance, tone shaping, and subjective color decisions. Manual curves provide direct control, while dedicated negative-conversion software can accelerate repeated work. Neither route produces one universally correct answer. Film stock, development, negative exposure, the light spectrum, the camera profile, and editing decisions all influence the result.
Positive transparencies do not require inversion, yet they demand careful highlight exposure because dense shadows and bright clear areas can exceed the camera’s usable range. Preserve the highlights in the capture, then evaluate shadow noise after processing. Exposure bracketing may help with unusually contrasty slides when the final workflow supports a controlled merge.
After basic conversion, crop beyond the holder edges, level or rotate the frame, and check orientation. If the emulsion side faced the camera, the image may require a horizontal flip. Spot remaining dust at 100 percent view. Camera capture provides no separate infrared dust channel, which makes preventive cleaning especially valuable.
Save a high-bit-depth master with edits preserved or documented, then create smaller JPEG or other delivery copies for web, festival catalog, or proofing use. Retain the original RAW capture, conversion settings, and naming relationship. This modest file discipline makes revisions possible without repeating the physical scan.
Is one capture enough, or should I stitch several photographs?
A single capture is simpler, faster, and usually sufficient for online display, contact sheets, editorial delivery, and many moderate-size prints. It also minimizes alignment errors and produces consistent grain structure. Judge it from the intended print or display distance before assuming that a larger file will reveal more useful information.
Estimate sampling by dividing the captured pixels across a measured film dimension by that dimension in inches. If 6,000 pixels cover 2.75 inches of film, the sampling rate is about 2,182 pixels per inch. This describes pixel sampling across that dimension; it does not prove that the film, lens, focus, holder, and camera resolved equivalent subject detail. The broader digitization guidance from FADGI emphasizes measurable imaging performance, evaluation, and quality management. A home setup should use that principle for disciplined testing without claiming formal compliance.
Stitching medium-format scans can raise sampling when the film holds fine information and a large output needs it. Keep exposure, aperture, focus, white balance, camera position, and light output fixed. Move the film or a controlled stage in a single plane, include generous overlap, and capture every section away from the lens’s weakest extreme corners. Merge the positive RAW-derived sections consistently, or ensure every negative section receives identical pre-merge treatment.
Inspect the composite for seams, geometric distortion, repeated or smeared grain, and tonal changes. Stitching multiplies dust and alignment work, so its practical value should be demonstrated in the final output.
What causes the most common 120 film scanning problems?
Why is one corner or edge soft?
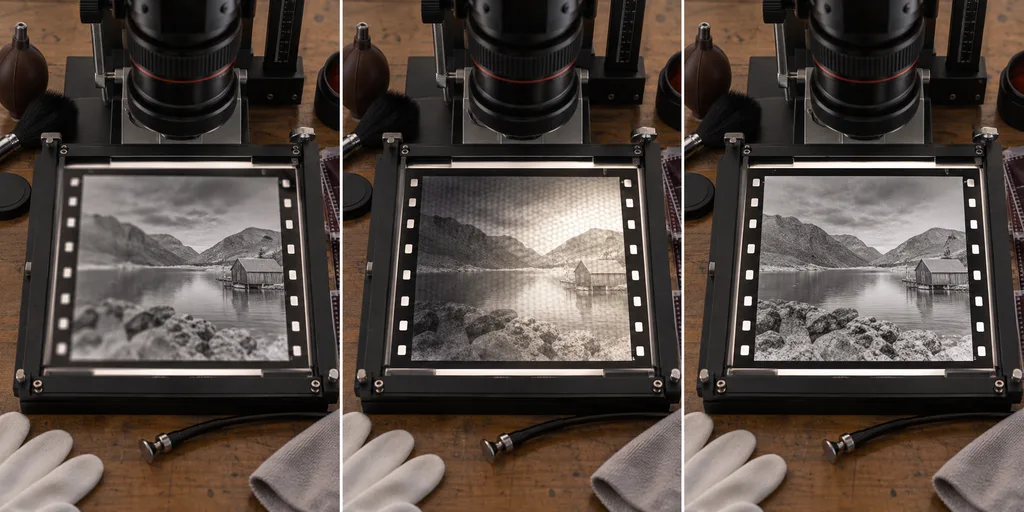
First inspect the film from the side for bowing, then check whether softness follows the holder or remains in the same image position when the negative is rotated. Recheck sensor-to-film parallelism and focus on grain in every corner. If alignment and flatness hold, compare apertures and consider lens field curvature. Changing one variable per test separates a tilted stand from a lens limitation.
Why is the center bright or the edge dark?
Capture the lit opening without film using settings that reveal subtle gradients. A bright center can indicate inadequate diffusion or insufficient distance above the panel; dark edges may come from the mask, holder, lens shading, or poor centering. Rotate the light source while keeping the camera fixed. A rotating pattern identifies the light, while a stationary pattern points toward the optical path or framing.
Where do colored blotches or visible LED pixels come from?
Colored patches can originate in the negative, an uneven light spectrum, reflections, flare, or aggressive conversion. Increase the film-to-light distance, improve diffusion, mask surplus light, and shade the lens. Make a blank-light capture and compare it with a film capture. Visible dots or grid patterns clearly indicate that the light source is too close or insufficiently diffused.
How can I control dust and stubborn curl?
Clean the work area, let airborne dust settle, blow both film surfaces gently, and capture promptly. Avoid canned-air propellant near film. Wear lint-free gloves and handle only the edges. For curl, allow the strip to relax in a suitable holder and improve edge support. Any pressure system should avoid scraping the image area. Dust that survives capture requires manual spotting because the camera file contains no automatic infrared defect map.
Can a phone digitize 120 film?
A phone can produce previews, catalog references, and modest web images when it supports close focus, RAW capture, manual controls, secure mounting, and careful alignment. Its fixed lens, computational processing, limited manual control, and difficulty resolving grain consistently can constrain demanding output. Test a phone file at the actual delivery size and inspect the corners before committing an entire archive.
What should I remember before scanning the next roll?
Successful camera scanning depends on a few controllable conditions: flat film, parallel planes, centered optics, even repeatable light, protected highlights, confirmed grain focus, and a consistent conversion process. Record the physical and exposure settings, inspect the first frame closely, and solve defects one variable at a time. That measured routine is the practical foundation of how to scan 120 film at home without a dedicated film scanner, whether the result is a quick festival preview or a carefully prepared print master.