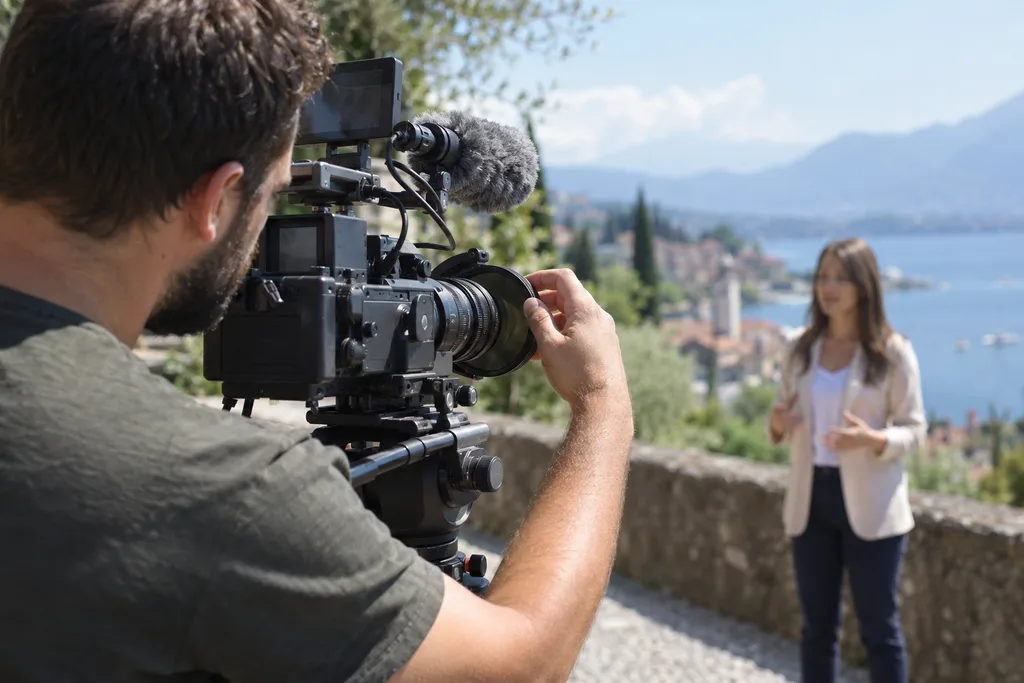
Cloud shadow covered the courtyard while I framed a 24 fps interview beside a pale stone wall. At 1/50 second, the movement of the speaker’s hands looked natural, and f/2.8 gave enough separation from the festival posters behind her. Then the sun cleared the roofline. Her face, the wall, and the white pages in her lap all jumped beyond the exposure I had chosen. Closing the aperture would change the visual design, lowering ISO was unavailable in the selected Log profile, and raising shutter speed would make motion crisper than I wanted.
That is the practical reason to learn how to use a variable ND filter for video. A variable neutral density filter reduces the light entering the lens while allowing the frame rate, shutter, ISO, and aperture to stay where the shot requires them. My field sequence is simple: choose frame rate, choose shutter angle or speed, select the recording profile and its appropriate ISO, set the aperture, turn the VND gradually, verify exposure with a dependable tool, and record a movement test. This order makes each decision traceable when the light changes.
On that courtyard setup, I fitted the filter, started near its minimum mark, and watched a waveform while rotating the outer ring. Once the face and bright paper sat within the intended range for our Log workflow, I checked the frame edges and recorded the hand gesture the interview would include. The operation was quick because every other exposure choice had already been fixed.
What the rotating filter changes
A VND filter commonly uses two polarizing elements whose relative rotation changes light transmission. The ring provides continuous adjustment across a stated range, although the clean, usable portion can be narrower than the engraved minimum and maximum suggest. The stop scale is logarithmic: one stop passes half as much light, two stops pass one quarter, and three stops pass one eighth. If an unfiltered image is three stops too bright, roughly three stops of ND can preserve the selected camera settings.
The filter itself does not create shallow depth of field or add dynamic range. It controls incoming light so a chosen aperture can produce the desired depth of field and a chosen shutter can produce the intended motion blur. This distinction matters in video because shutter affects motion from frame to frame. A faster exposure can make moving edges look clipped and urgent; a longer exposure spreads movement across more of each frame and can appear softer.
A 180-degree shutter angle exposes each frame for approximately half its interval. At 24 fps that is close to 1/48 second, commonly rounded to 1/50 on cameras offering conventional shutter speeds. It is a familiar starting point, never a creative law. Action, intentional blur, LED flicker, mains frequency, or delivery requirements may justify another value. RED’s shutter conversion guidance explains the relationship among exposure time, frame rate, and shutter angle, including 23.98 fps at 180 degrees as approximately 1/47.95 second.
| Recording frame rate | Approximate 180-degree shutter |
|---|---|
| 23.98 or 24 fps | 1/48 or 1/50 second |
| 25 fps | 1/50 second |
| 29.97 or 30 fps | 1/60 second |
| 50 fps | 1/100 second |
| 59.94 or 60 fps | 1/120 second |
The useful VND range follows the job. A modest range may cover interviews under broken cloud with finer control, while a stronger range can help a wide-aperture shot in hard midday sun. No stop range is universal, and manufacturer labels do not guarantee identical color, uniformity, or maximum-density performance. I select tested combinations of lens, filter, sensor, and profile, leaving enough headroom that the ring rarely reaches its extreme position.
A repeatable setup from frame rate to test recording
Begin with the recording frame rate required by the project. For the courtyard interview it was 23.98 fps, delivered as 24 fps. Slow-motion recording at 59.94 fps changes both the shutter target and the light required. Next, set the shutter angle or corresponding shutter speed. I generally begin at 180 degrees, then test any change for motion and flicker before treating shutter as an exposure adjustment.
Select the camera profile and its appropriate base or native ISO. “Use the lowest ISO” fails as a universal rule, especially with Log profiles and dual-base cameras. Follow the camera manufacturer’s guidance for the selected mode and understand how the profile allocates highlight and shadow latitude. Lock ISO during a controlled manual setup. Auto ISO can brighten the image as the VND becomes denser, making the filter appear ineffective while introducing visible exposure or noise changes.
Set aperture according to the scene. I choose it for depth of field, focus tolerance, and lens behavior. An interview at f/1.4 may look appealing during a static rehearsal, yet prove fragile when the subject leans forward. Documentary coverage often benefits from a little more depth. Once aperture is fixed, attach a clean VND securely, confirm that the ring and step-up adapter move correctly, and begin close to minimum density. Rotate slowly toward greater density while watching the subject and brightest important detail.
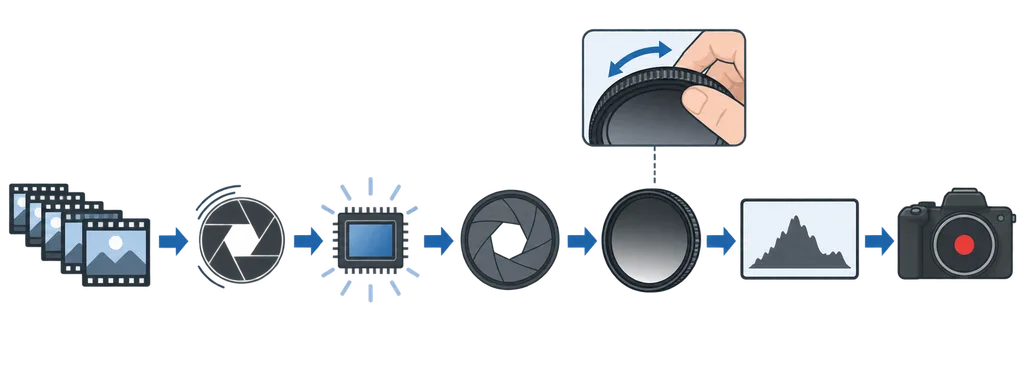
Bright outdoor LCDs are persuasive and unreliable. Screen brightness, reflections, viewing angle, and a sun hood can change how the picture appears. Zebras mark pixels reaching a selected threshold, so they help only when the threshold and target are understood. A histogram summarizes tonal distribution without showing where tones occur. A waveform relates signal level to horizontal image position, making a bright wall beside a face easier to distinguish. False color maps exposure ranges onto image areas and can be quick for evaluating faces, highlights, and shadows. This guide to using false color to judge exposure offers further context for reading the display.
Log adds another check: determine whether the exposure aid reads the recorded Log signal or an image processed through a viewing LUT. An attractive LUT preview can conceal clipped source data, and a tool calibrated for the Log feed may show values that look unfamiliar beside an SDR display. Camera documentation and a controlled gray-card and clipping test reveal how a particular system behaves. I avoid prescribing a universal skin-tone IRE value because cameras, profiles, LUTs, and SDR or HDR monitoring place signals differently.
After adjusting density, inspect the whole frame at magnification and record ten or fifteen seconds. Ask the subject to move, pan across the planned background, and include the brightest composition. Play the file back to check highlight retention, motion blur, focus, color, and density variation. This test is an essential part of how to use a variable ND filter for video, since several artifacts become obvious during movement while remaining easy to miss in a static frame.
When the light and the filter fight back
During our interview, thin clouds returned between answers. I made small VND changes between takes, called out each adjustment for the sound record, and repeated the waveform check. Turning the ring during an answer would have produced a visible exposure ramp and might have changed reflections on the speaker’s glasses. For continuous observational footage, I decide whether a slight exposure drift, controlled aperture pull, or internal electronic ND transition will be least distracting for that camera and scene.
My most useful failure happened during a rushed exterior take. I rotated a VND beyond the portion I had tested because the sunlight had intensified. A dark diagonal X spread through the image; glare on the small monitor made it resemble ordinary shadow until playback. This X pattern occurs when the polarizing layers reach an unfavorable relationship, often near extreme density. HOYA explicitly warns that its Variable Density II can show a cross-like pattern near maximum and also publishes model-specific wide-angle cautions. Those focal-length cautions describe that product and should not be transferred to every VND.
The practical response to an X pattern or uneven density is to back the ring away from maximum. If the scene remains too bright, use a stronger tested VND range, suitable camera-native internal ND, or an appropriate fixed ND. Avoid casual filter stacking. Extra rings can increase reflections and mechanical vignetting, while another polarizer can interact unpredictably with the VND. Inspect the corners at the actual focal length, focus distance, stabilization mode, and aperture planned for the take.
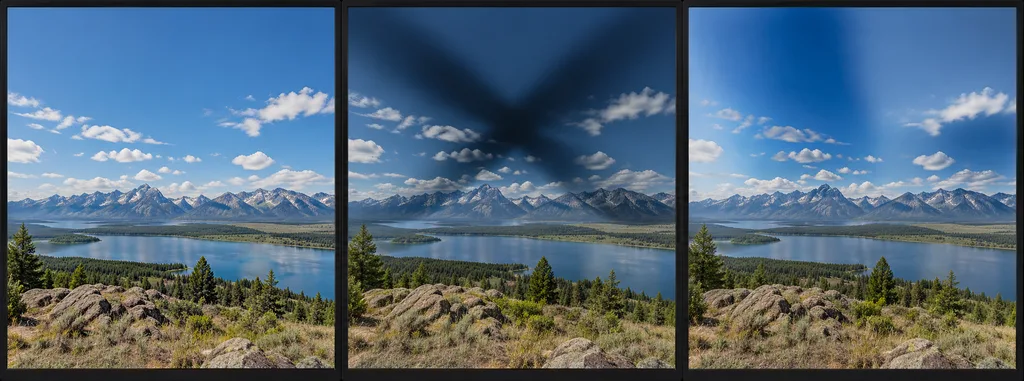
Polarization can change blue skies, water, glass, glossy leaves, painted surfaces, and reflections. On a waterfront sequence, I once approved a static frame, then made a test pan and watched the sky darken unevenly as the camera angle shifted relative to the sun. The water reflections changed at the same time. I reduced the filter strength and revised the pan so the effect stayed modest. Wide lenses can make an uneven sky especially prominent because they cover a broad range of angles. Test the complete camera move in both directions, including tilts that introduce reflective surfaces.
Color cast, reduced contrast, flare, and slight softness also vary among filters and can increase at stronger settings. White-balance with the intended filter attached when the workflow allows, then record a neutral reference and a face under production light. Compare minimum, middle, and upper usable settings on the actual camera. White balance may manage a consistent tint; it cannot repair an X pattern, corner obstruction, or complex color variation across the frame. Keep the glass clean, shade it from stray light, and treat coatings as help with contrast and maintenance, never a cure for every optical problem.
Choosing the filter and leaving with usable footage
A variable ND earns its place when light shifts quickly, a documentary moment cannot be repeated, or a compact kit needs continuous exposure control. Fixed ND filters are often more predictable when illumination is stable, strong reduction is required, cameras must match closely, or a VND introduces unacceptable polarization and color artifacts. I use fixed filters for controlled setups and accept the slower process of changing strengths. For roaming coverage beneath passing cloud, a tested VND usually saves time.
A larger filter with step-up rings can cover several smaller lens threads, reducing the number of filters carried. Confirm the lens thread diameter, step-up direction, front-cap size, hood clearance, matte-box fit, and whether the filter frame enters the view on the widest lens. Physical end stops help prevent excessive rotation. Clear markings, smooth resistance, useful coatings, and a case protecting both glass surfaces matter in daily handling.
- Match the thread size or pack the correct step-up rings.
- Test minimum, middle, and upper density on every important lens.
- Check end stops, color, sharpness, flare, corners, and camera moves.
- Carry a blower, clean cloth, caps, and protective case.
Should auto ISO stay enabled?
For this repeatable manual workflow, lock ISO at the appropriate value for the selected profile. Auto ISO may counteract a VND adjustment and change noise or highlight behavior during a shot. Run-and-gun work may occasionally justify automation, but test its transition limits and exposure compensation beforehand.
Can I leave the filter at maximum density?
Use maximum density only when the specific filter, lens, camera, and composition have passed a recorded test there. If an X pattern, color shift, or uneven frame appears, reduce rotation and choose another ND solution.
Does a VND directly change depth of field?
No. It reduces incoming light and allows you to retain a selected aperture in bright conditions. Aperture controls depth of field together with focal length, focus distance, sensor format, and viewing conditions.
Is a photographic VND safe for viewing the sun?
No. Ordinary photographic VND and ND filters are not solar-viewing filters. Never use one to look directly at the sun or improvise camera protection for direct solar observation. Use equipment specifically certified and designed for the intended solar task.
The reliable sequence is worth memorizing: frame rate, shutter, profile and appropriate ISO, aperture, gradual VND adjustment, exposure-tool confirmation, then a recorded movement test. Before rolling, inspect highlights, face exposure, frame edges, color, reflections, sky uniformity, and motion. That brief discipline kept the courtyard interview consistent as clouds crossed the sun, and it gives every later correction a clear cause instead of leaving the filter ring to solve every visual decision.