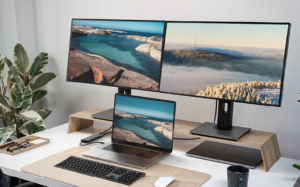
An external monitor used to be something only video crews carried. The director and the digital imaging technician hovered over a screen that was a foot wide and showed exactly what the camera was recording, framed properly, with waveforms and zebras and focus assist overlays. Photographers, by contrast, framed against a viewfinder and chimped the rear screen. The two worlds barely overlapped.
That has changed. Mirrorless bodies record video well enough that even still photographers end up shooting it occasionally, and the small flip-out screen on the back of the camera is not always the easiest way to monitor the recording. Tethered tablet apps and external monitor accessories have crept into still workflows too. Product photographers shooting tethered to a laptop are looking at a colour-managed monitor, not the back of the camera. Once you start thinking of the camera’s rear screen as one option among several, the question of what makes a good monitor becomes worth thinking about.
Brightness, and why it is the first number to read
Monitor brightness is measured in nits, which is a fancy way of saying candelas per square metre. A typical office monitor produces 200 to 350 nits. A consumer television produces 400 to 600 nits. A monitor designed for outdoor use on a video shoot, like the SmallHD Cine 7 or the Atomos Shogun, sits in the 1500 to 2200 nit range. The reason this matters is sun. A 300 nit panel held up in direct daylight is unreadable. A 1500 nit panel held up in the same daylight is bright enough to compose against.
For studio or indoor work, a brighter panel is overkill, and lower-brightness monitors are usually cheaper and have better colour accuracy at the same price point. For outdoor work, anything below about 1000 nits is unusable without a sun hood. A practical overview of field monitors and what their specs translate to on set covers the gap between marketing brightness and real-world usability if you are choosing between options. The earlier piece on memory card speed and sustained throughput is also relevant when you start recording an external feed alongside the camera’s internal recording.
Why claimed nits are not always real nits
A monitor’s quoted brightness is usually its peak, not its sustained output. Many panels can hit their headline number for a few seconds, especially with bright content, then thermal protection or power limiting brings them down. For a still photographer doing brief sessions, this rarely matters. For a video shoot in direct sun running an hour, the sustained brightness is what counts, and it is often a third less than the peak figure on the box.
Some monitor manufacturers publish both numbers, which is a sign of good faith. Most do not, and the headline figure on the spec sheet is the optimistic one.
Colour space and the gap between what the panel can show and what your camera records
Three colour gamuts come up in monitor specifications. sRGB is the standard for the web, computer monitors, and most printed work intended for casual viewing. P3 is wider, and is the colour space Apple uses for its consumer displays and that most modern phones target. Rec 2020 is wider still, and is the target for high dynamic range video, though no consumer monitor actually reaches all of it.
For still photography, sRGB is usually enough unless you are doing colour-critical print preparation, in which case you want at least P3 and ideally a display with hardware calibration support. For video, especially log video that will be graded, you want a monitor that covers as close to Rec 709 as possible at minimum, with P3 or wider if you are working in HDR.
The mismatch comes when the camera records a colour space the monitor cannot display. Log footage from a modern camera contains far more colour information than even a high-end monitor can show. This is fine in post, where the grade brings the image back into a standard space, but it means the live preview on your monitor is not exactly what the camera is recording. Some monitors apply a LUT, a look up table, to compensate, transforming the log feed into something that looks closer to the final graded image. A monitor with no LUT support shows you flat, washed-out log, which is technically accurate but not useful for judging exposure or composition.
Calibration and why it slowly goes off
A new monitor is calibrated at the factory to some standard, often poorly. The cheaper the monitor, the looser the factory calibration. After about 1000 hours of use, even a good monitor’s colour and brightness have drifted enough to be visible against a reference. Calibration with a hardware probe, of which the X-Rite i1 Display Pro and the Datacolor Spyder are the most common, brings the monitor back to a known target.
For monitors that support hardware calibration, the probe writes the correction directly into the monitor’s internal LUT, and the system displays correctly without the operating system needing to do anything. For monitors without hardware calibration support, the probe creates a software profile that the operating system uses to remap the output, which works but is one more step away from the actual signal. A clear primer on how to read on-camera monitor specifications including LUT support and exposure tools covers the production side of the same question.
What the camera’s screen does and does not do
The screen on the back of a modern camera is a small panel optimised for viewing in a specific way at a specific angle. It is usually bright enough for the conditions the manufacturer expects, accurate enough for casual review, and not really designed for sustained, colour-critical work. The histogram on top of the live view is the source of truth for exposure, the way our notes on the different shutter modes describe in the context of judging motion blur as well, not the image itself.
This is fine for the use case the camera was designed for. It becomes a limitation when you need a larger surface for collaborative review, when you need to record an HDMI feed to an external recorder, or when you simply want to see what you are doing at a more comfortable size than three inches diagonal.
The HDMI route versus the wireless route
External monitors connect by HDMI in almost every case for video work. Wireless options exist, both first-party like Sony’s Monitor and Control app or Fujifilm’s Camera Remote, and third-party like Accsoon and Hollyland, but wireless adds latency, occasional dropouts, and requires battery power on the receiver. For composition and rough focus, wireless is fine. For final focus check on a long lens, wired is more reliable.
Wireless to a tablet has become a viable workflow for product and studio still photography, where the tablet sits on a stand and the photographer composes against it. The latency does not matter for still work since you are not capturing motion. The colour accuracy of a current iPad Pro or similar tablet is good enough for most commercial work, especially if the device is in a controlled lighting environment rather than under changing daylight. A useful introduction to tethered shooting workflows covers the software side of running a tablet or laptop as the main monitor.
Choosing one
The honest summary is that the right monitor is the smallest, cheapest one that meets your actual needs, not the largest one your budget allows. For occasional video work in shade or indoors, a 5-inch 1000-nit panel is plenty. For outdoor video work in direct sun, a 7-inch 1500-nit panel or brighter is the minimum, and the additional weight and battery draw are real costs. For studio still work, a 10-inch tablet running tethering software gives you the screen size without the on-camera weight.
Resolution matters less than you might think. A 7-inch monitor at 1920 by 1080 has higher pixel density than most 27-inch desktop monitors at the same resolution, and your eyes cannot resolve more detail than the screen is producing at typical viewing distances. The features that matter more than pixel count are accurate exposure tools like the waveform monitor, RGB parade, and false colour, focus assist with peaking and a magnified loupe, and frame guides for the aspect ratio you are shooting in. Many cheap monitors have the resolution but skimp on the tools, and the tools are why a real field monitor is worth the price over a generic small display panel with HDMI input.